Vercel Deployment
We released the @waline/vercel package as server package, Vercel deployment is also our most recommended way.
How to Deploy
Click the blue button above, it will redirect you to vercel to deploy with waline template.
Note
If you haven't logined, we recommend you to sign in with GitHub.
Input your Vercel project name then click
Create.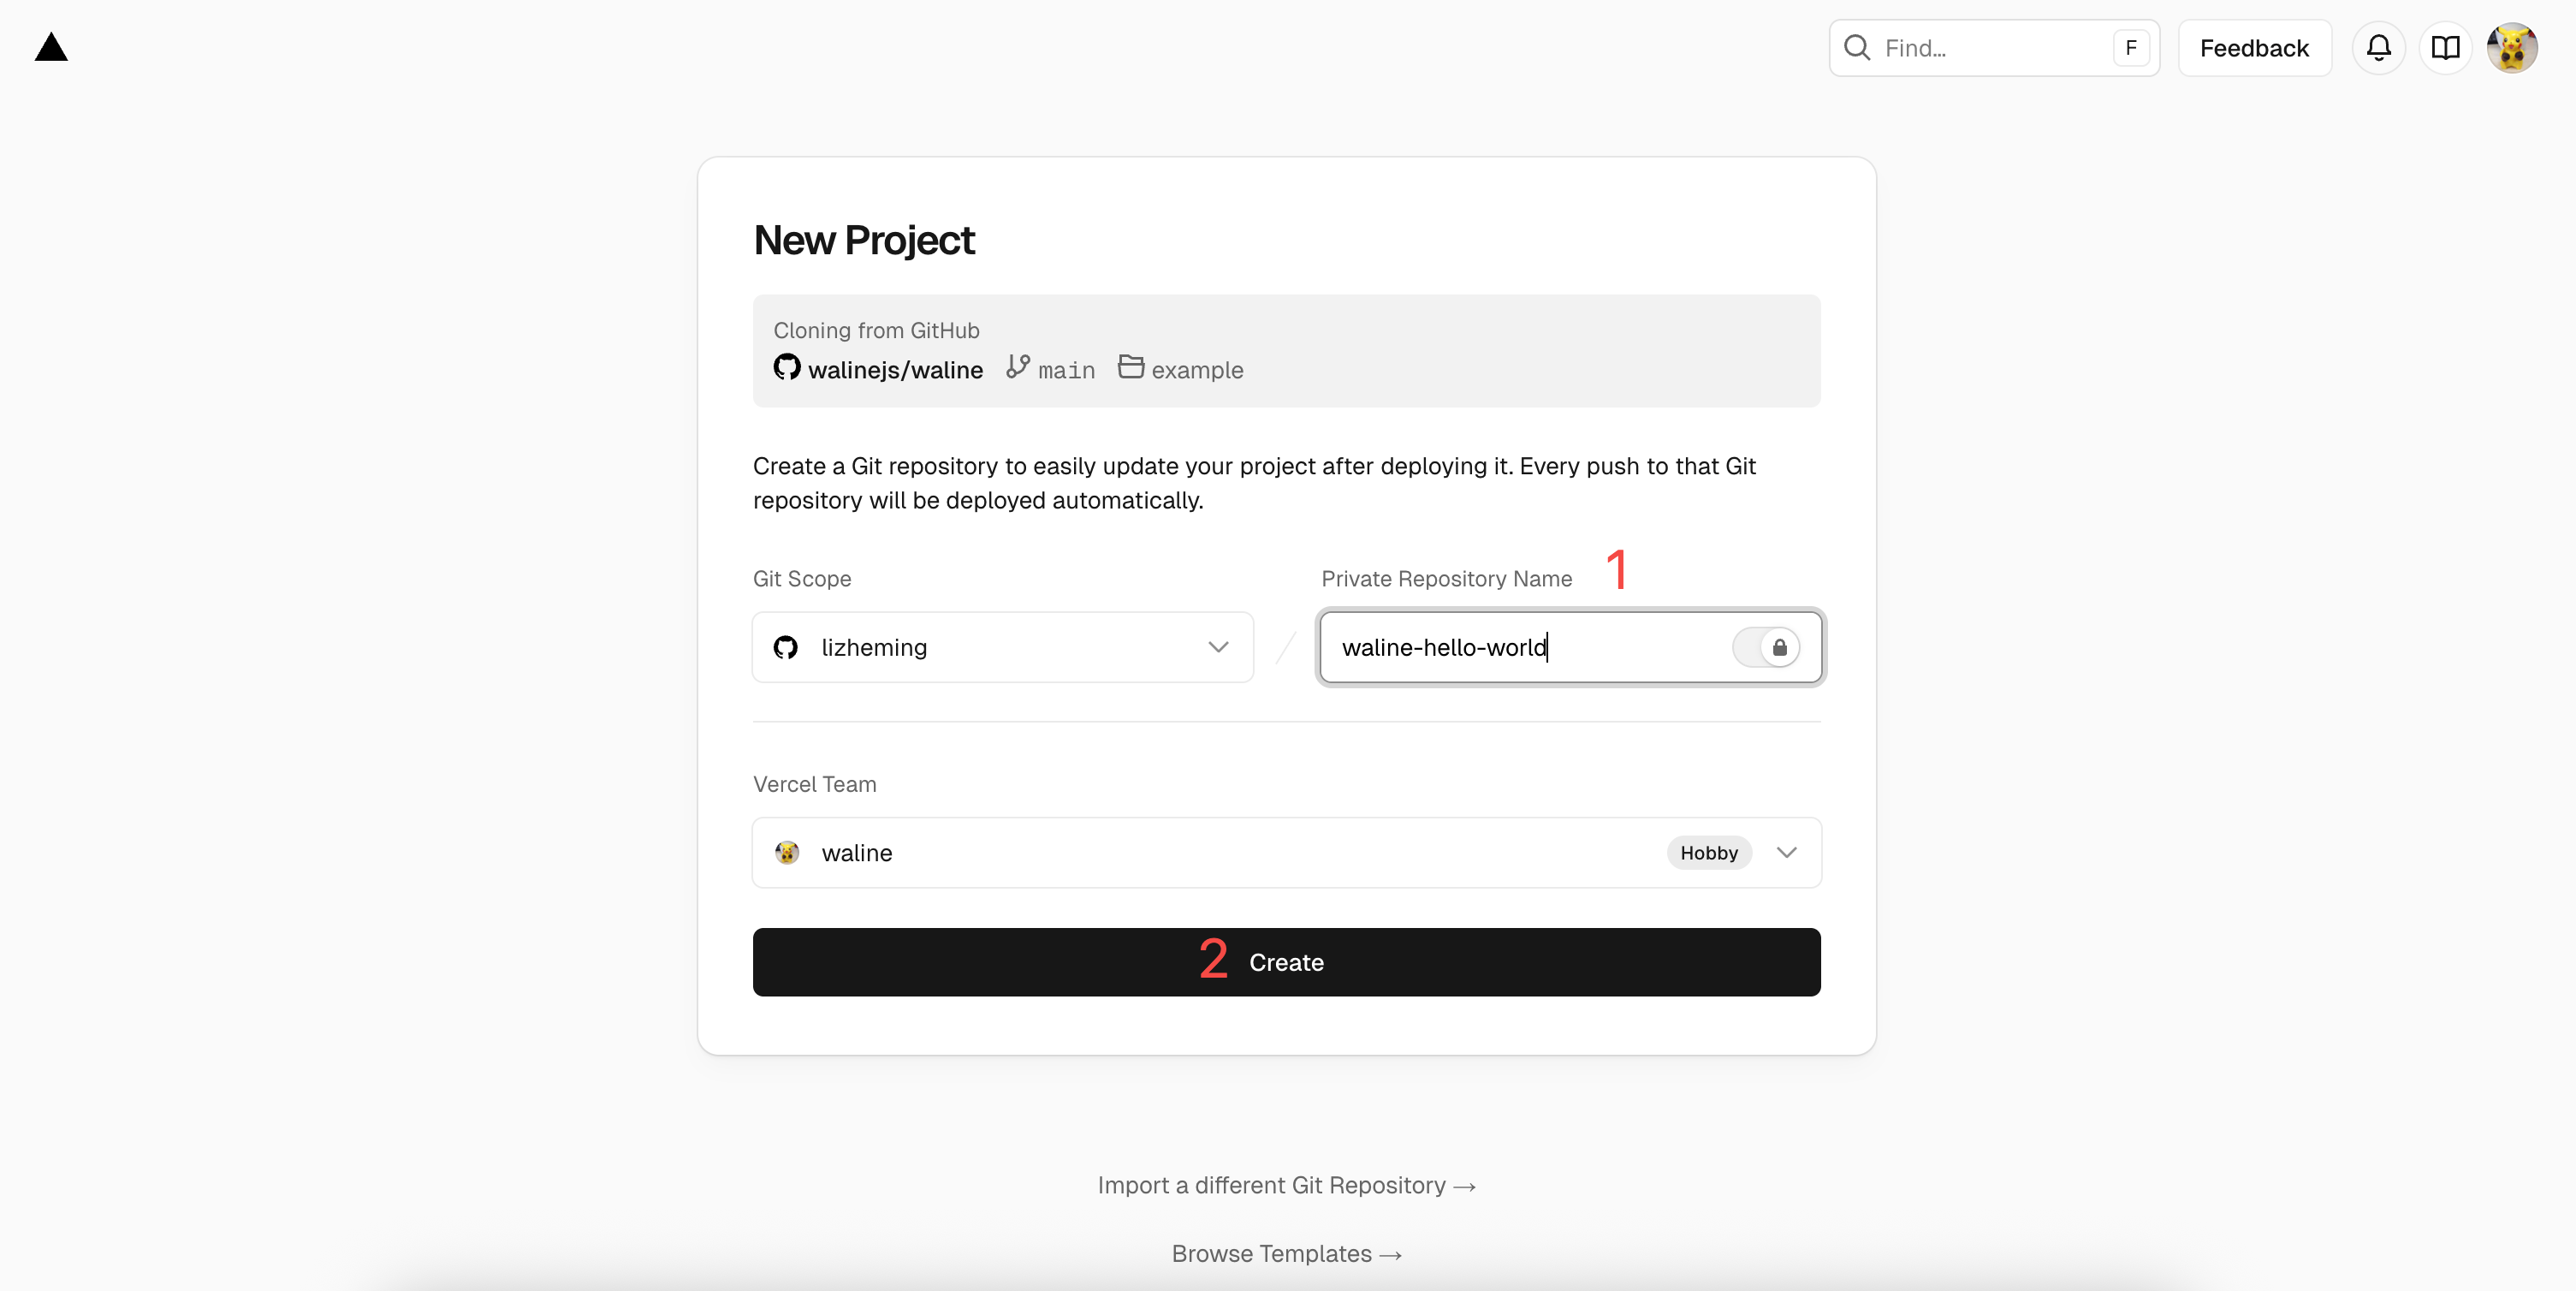
Create Project Repo which named you input before will be created and initialized automatically base on waline example template by Vercel.
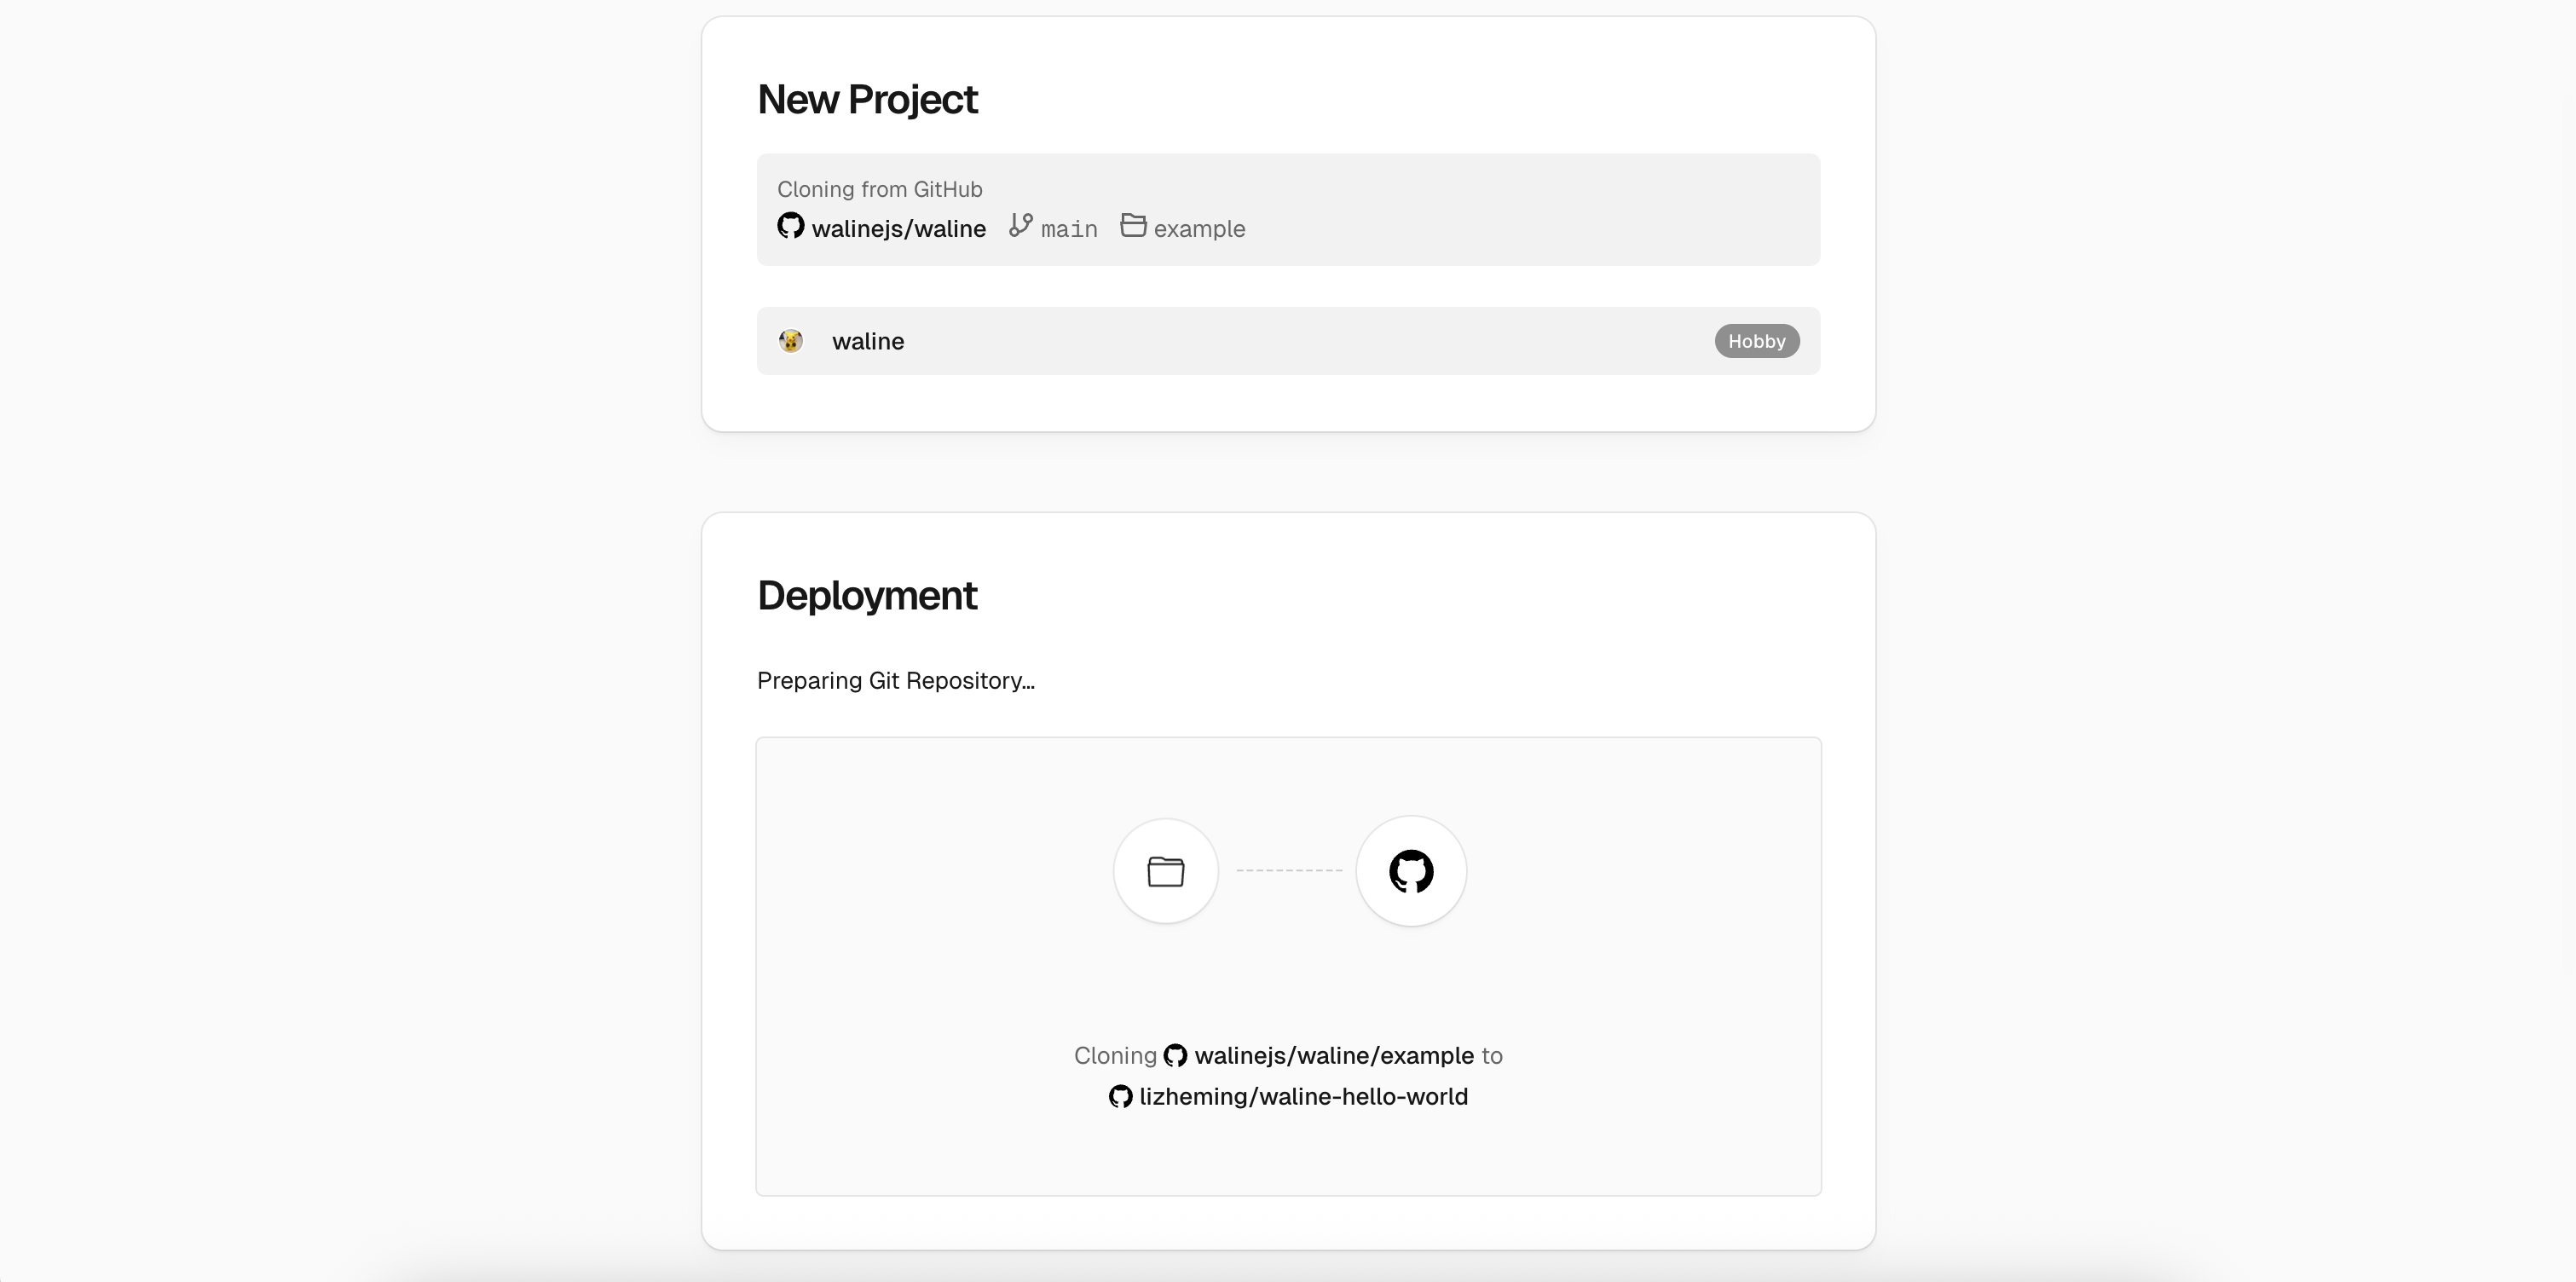
new project After one minute or two, vercel should finish the deployment. Click
Go to Dashboardbutton to redirect to your application dashboard.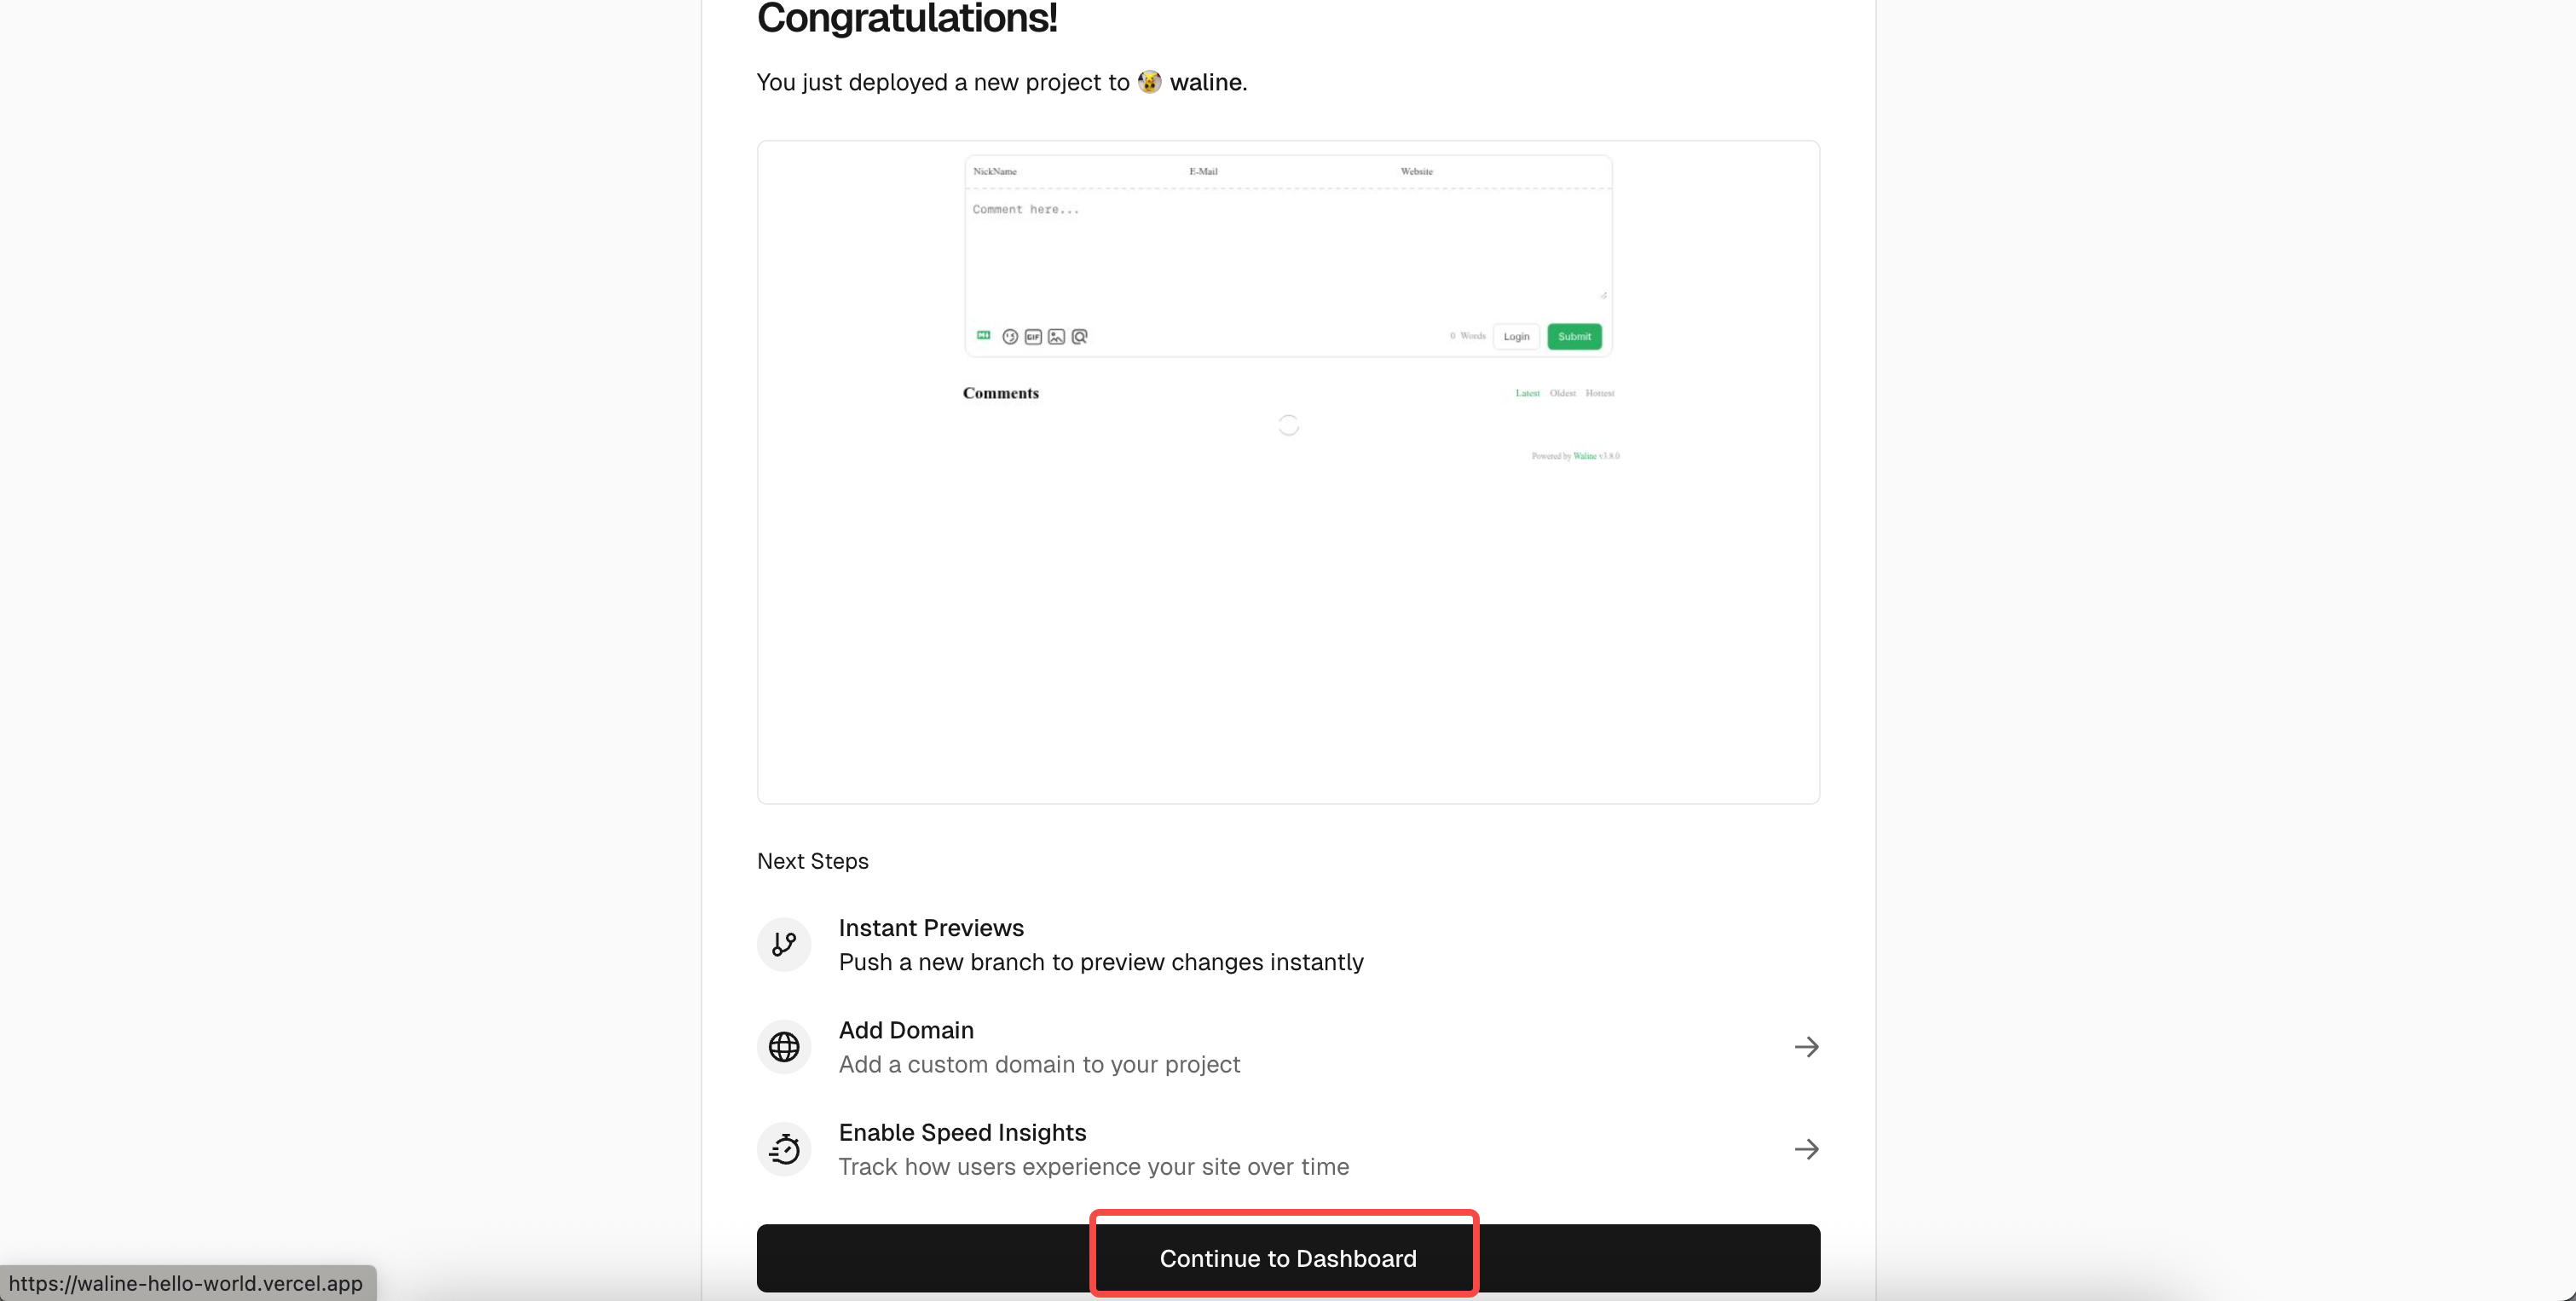
dashboard
Create Database
Click
Storageat the top to enter the storage service page, chooseCreate Database. UnderMarketplace Database Providers, selectNeon, then clickContinue.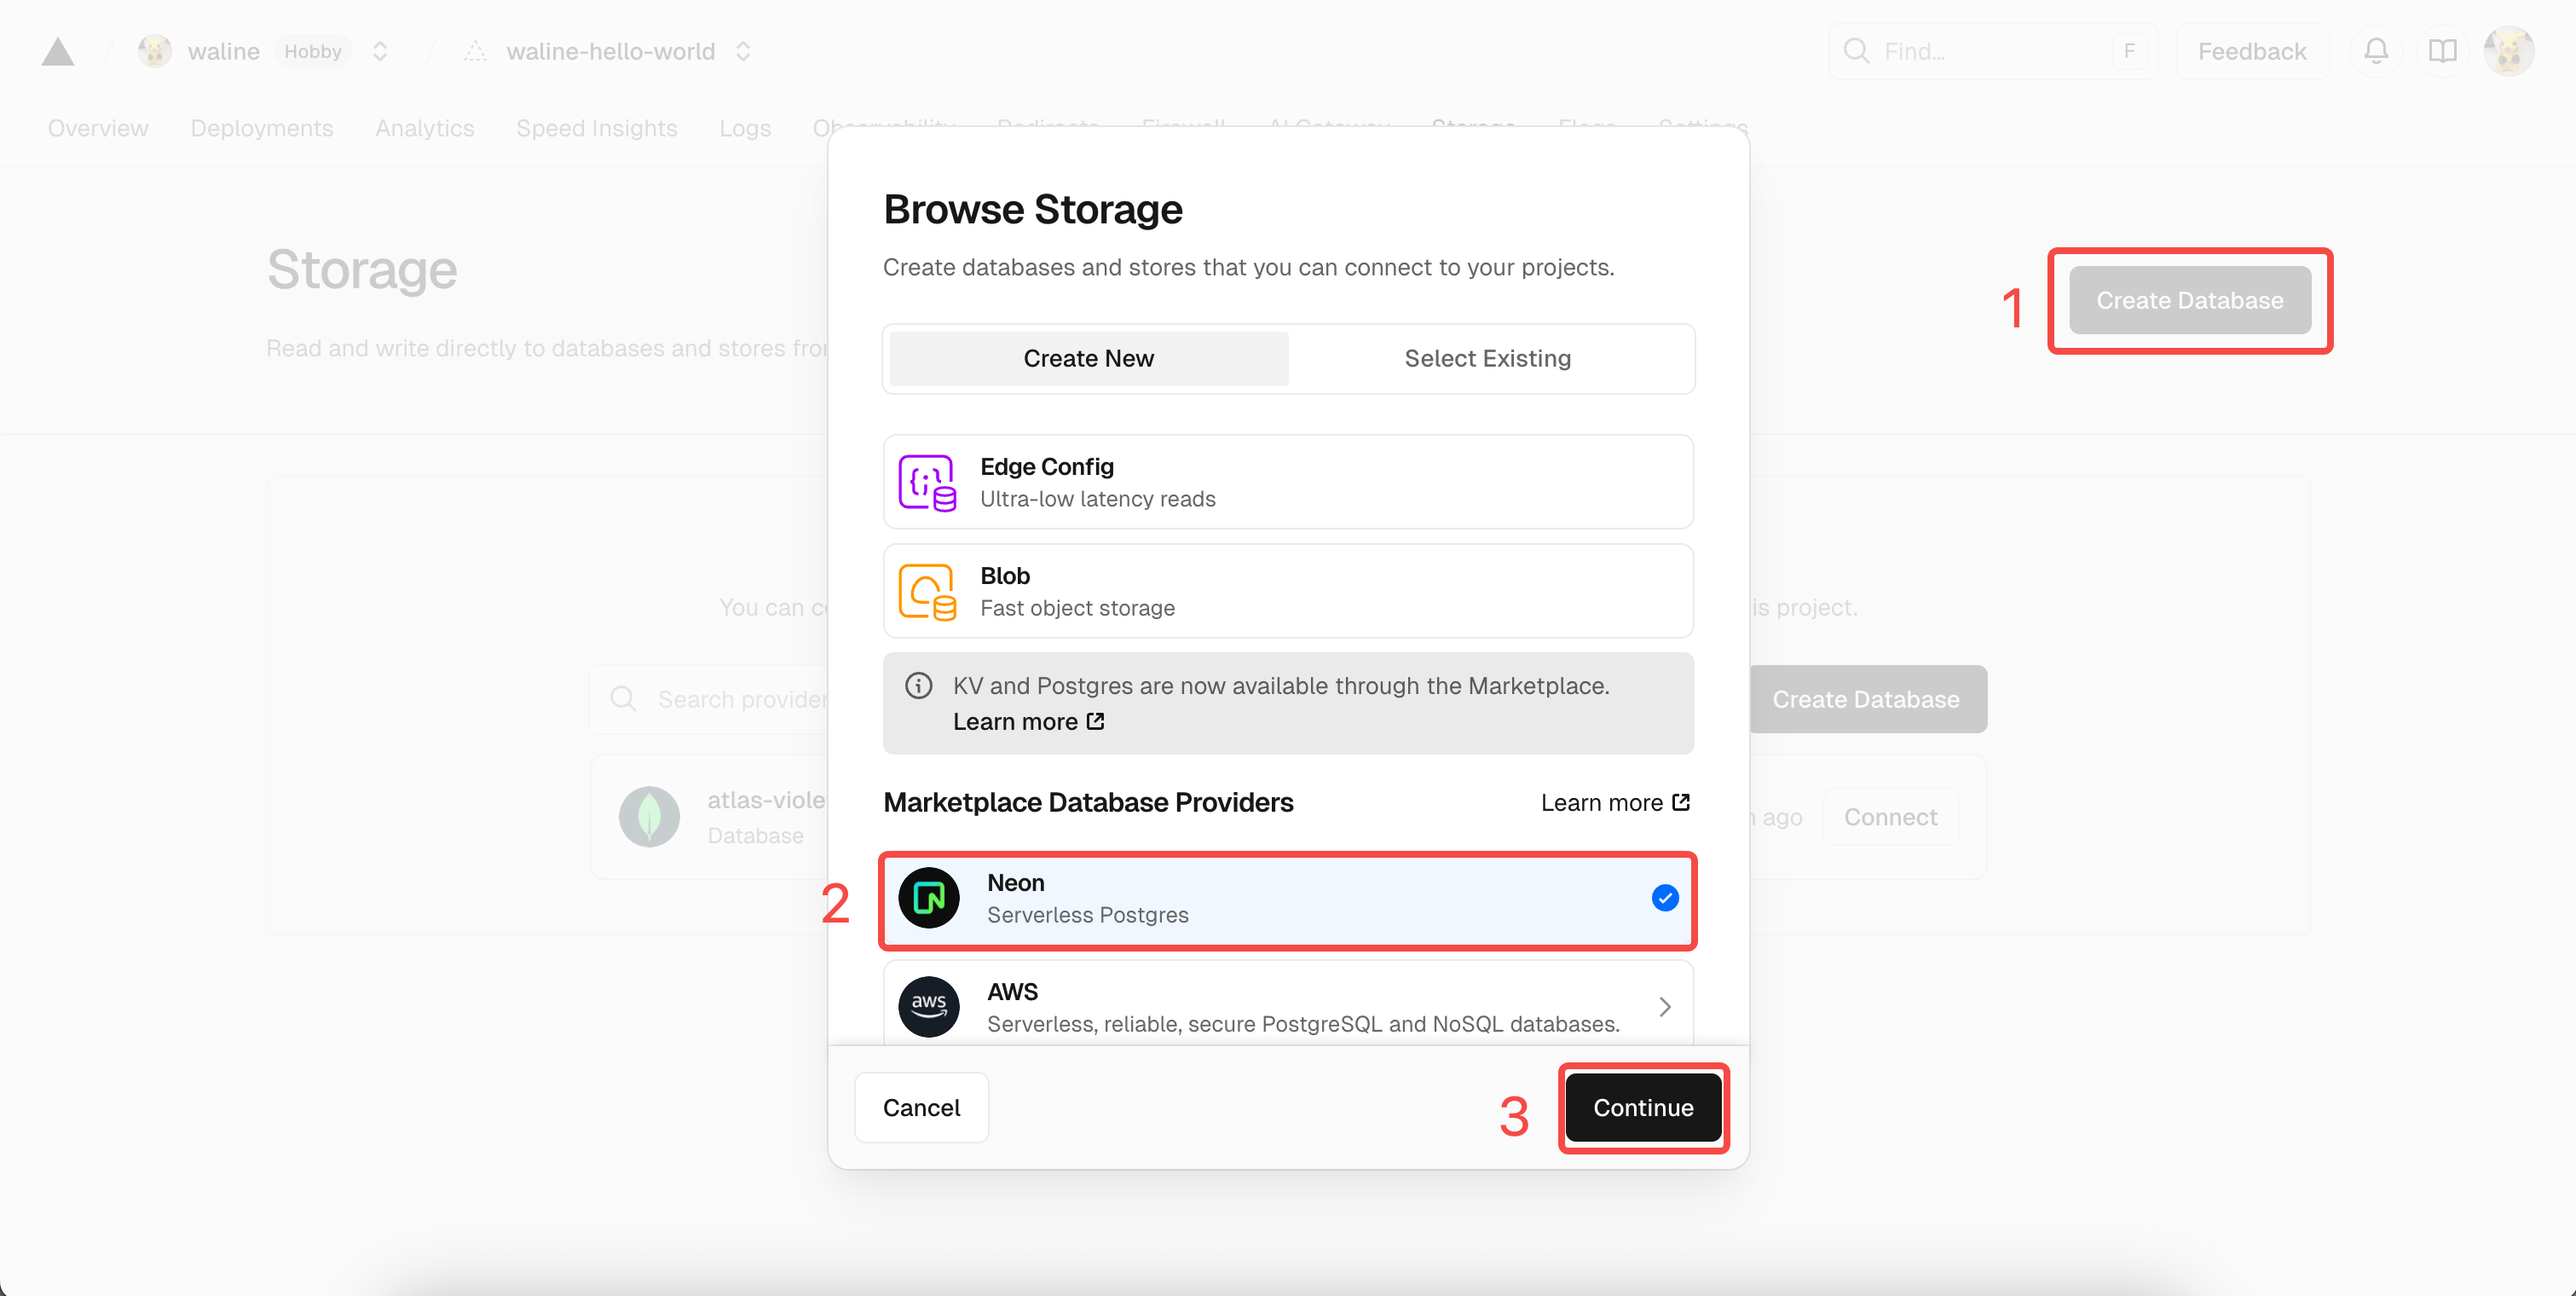
storage You will be prompted to create a Neon account. Choose
Accept and Create. Next, select the database plan configuration, including region and quota. You can leave defaults and clickContinue.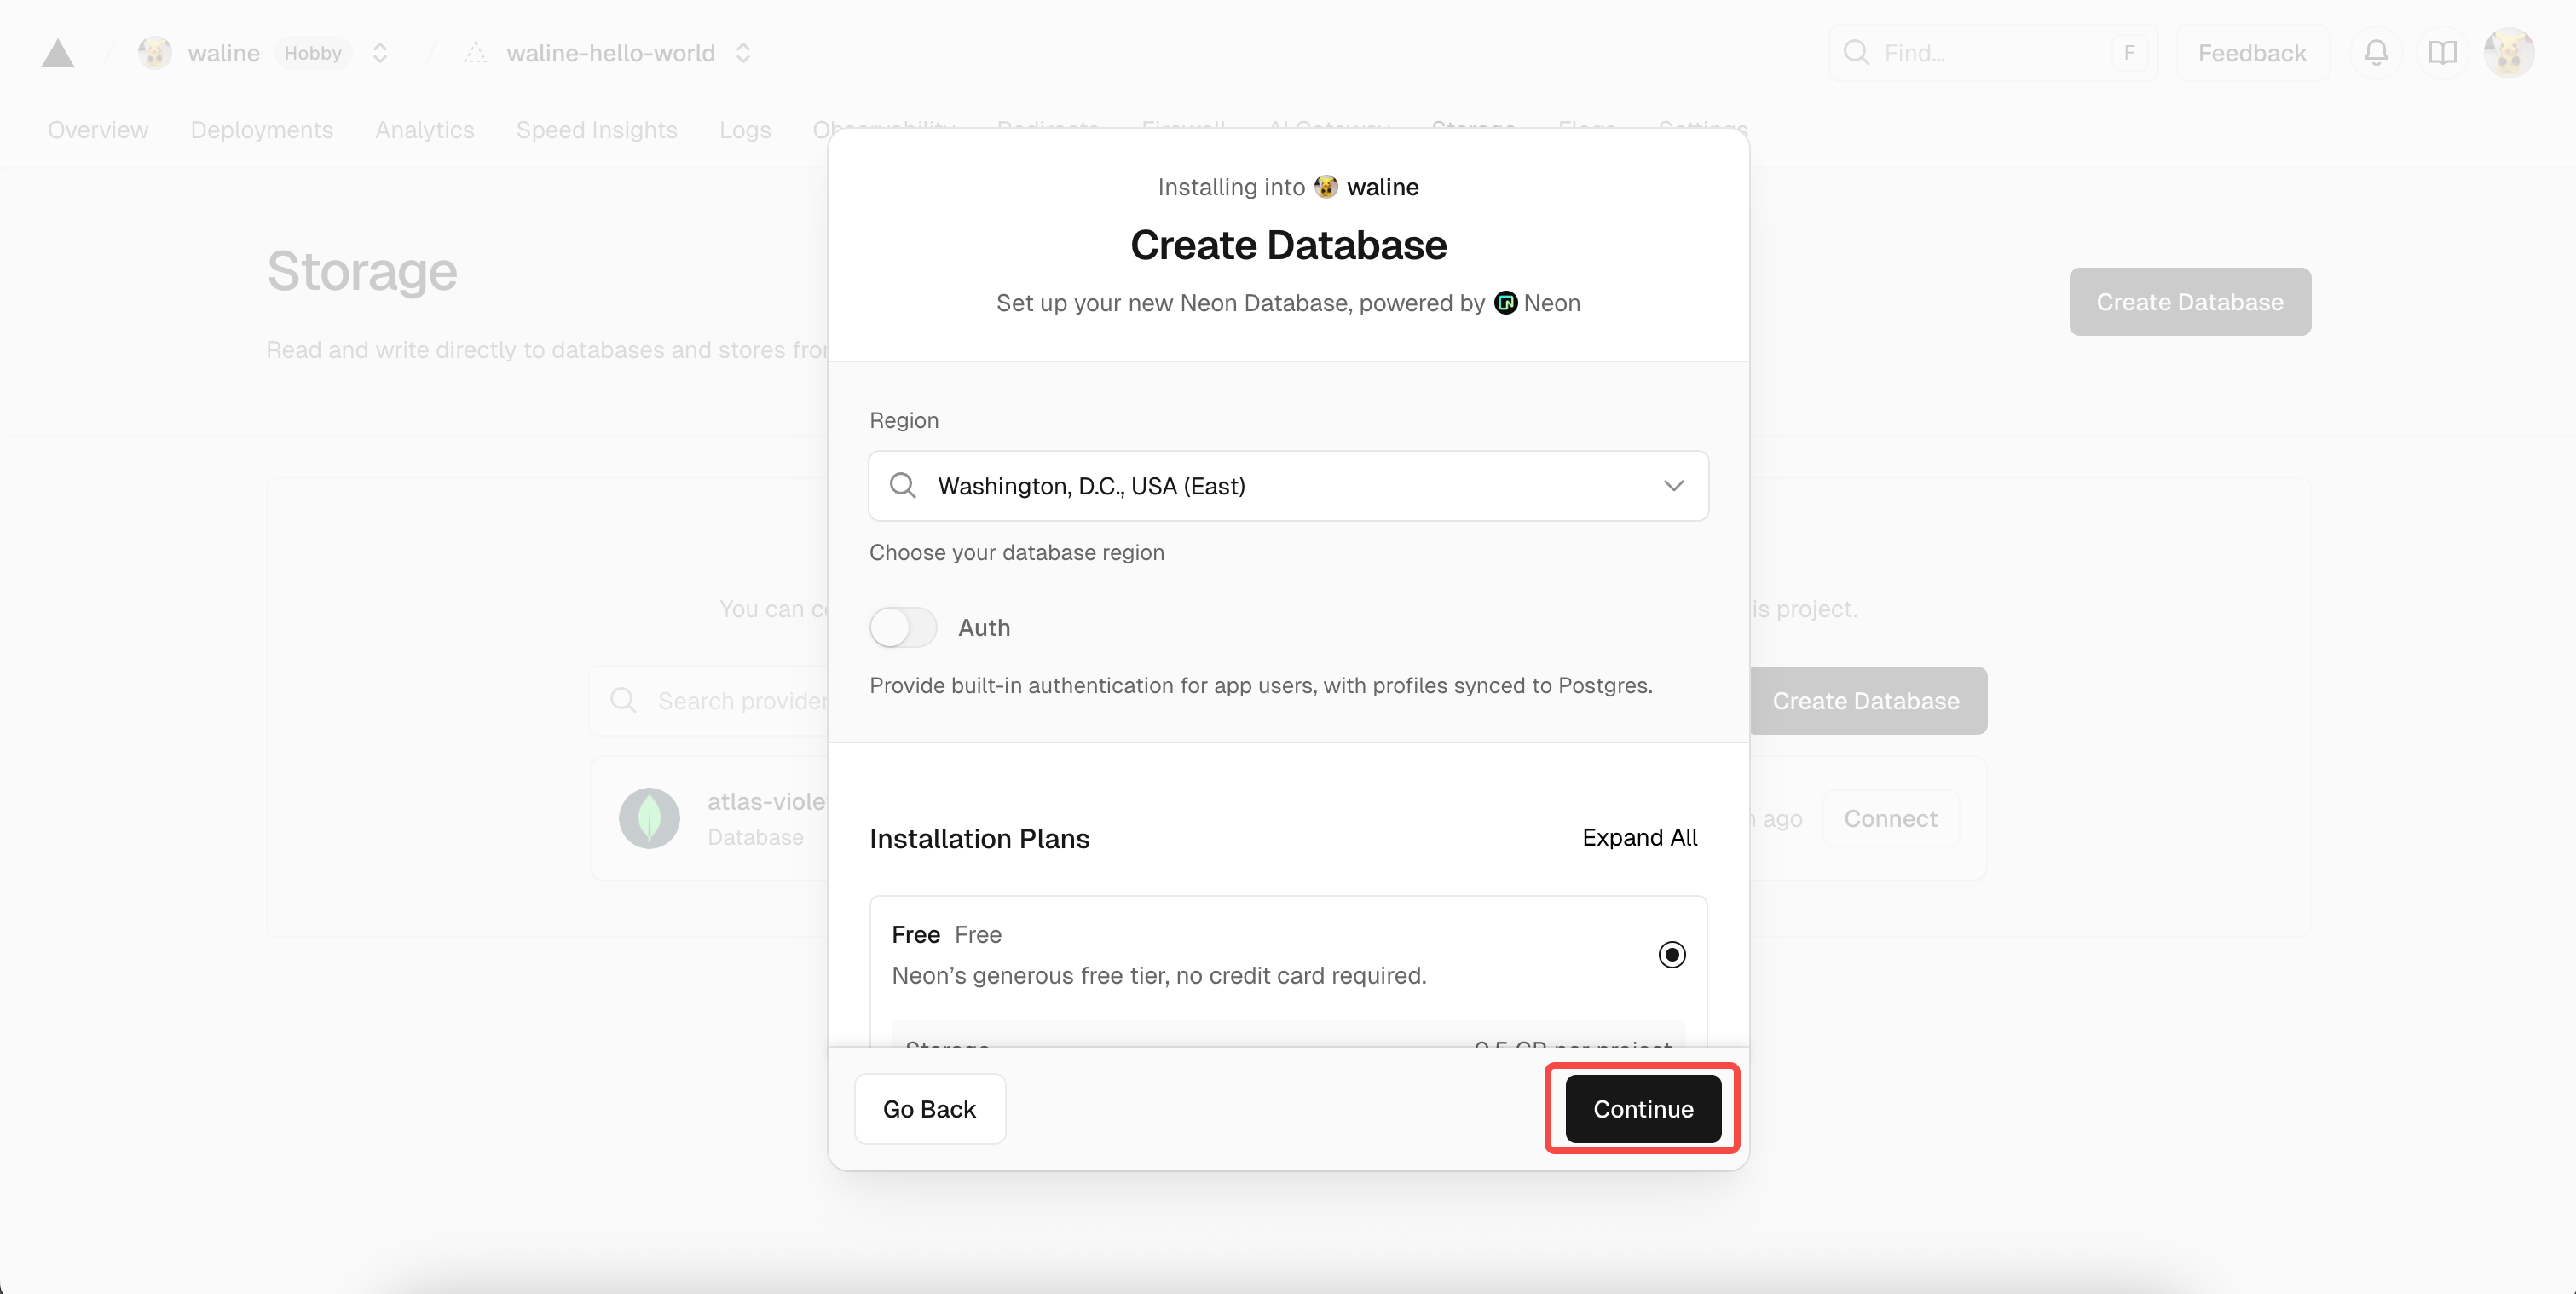
neon Define the database name. You can keep the default and click
Continue.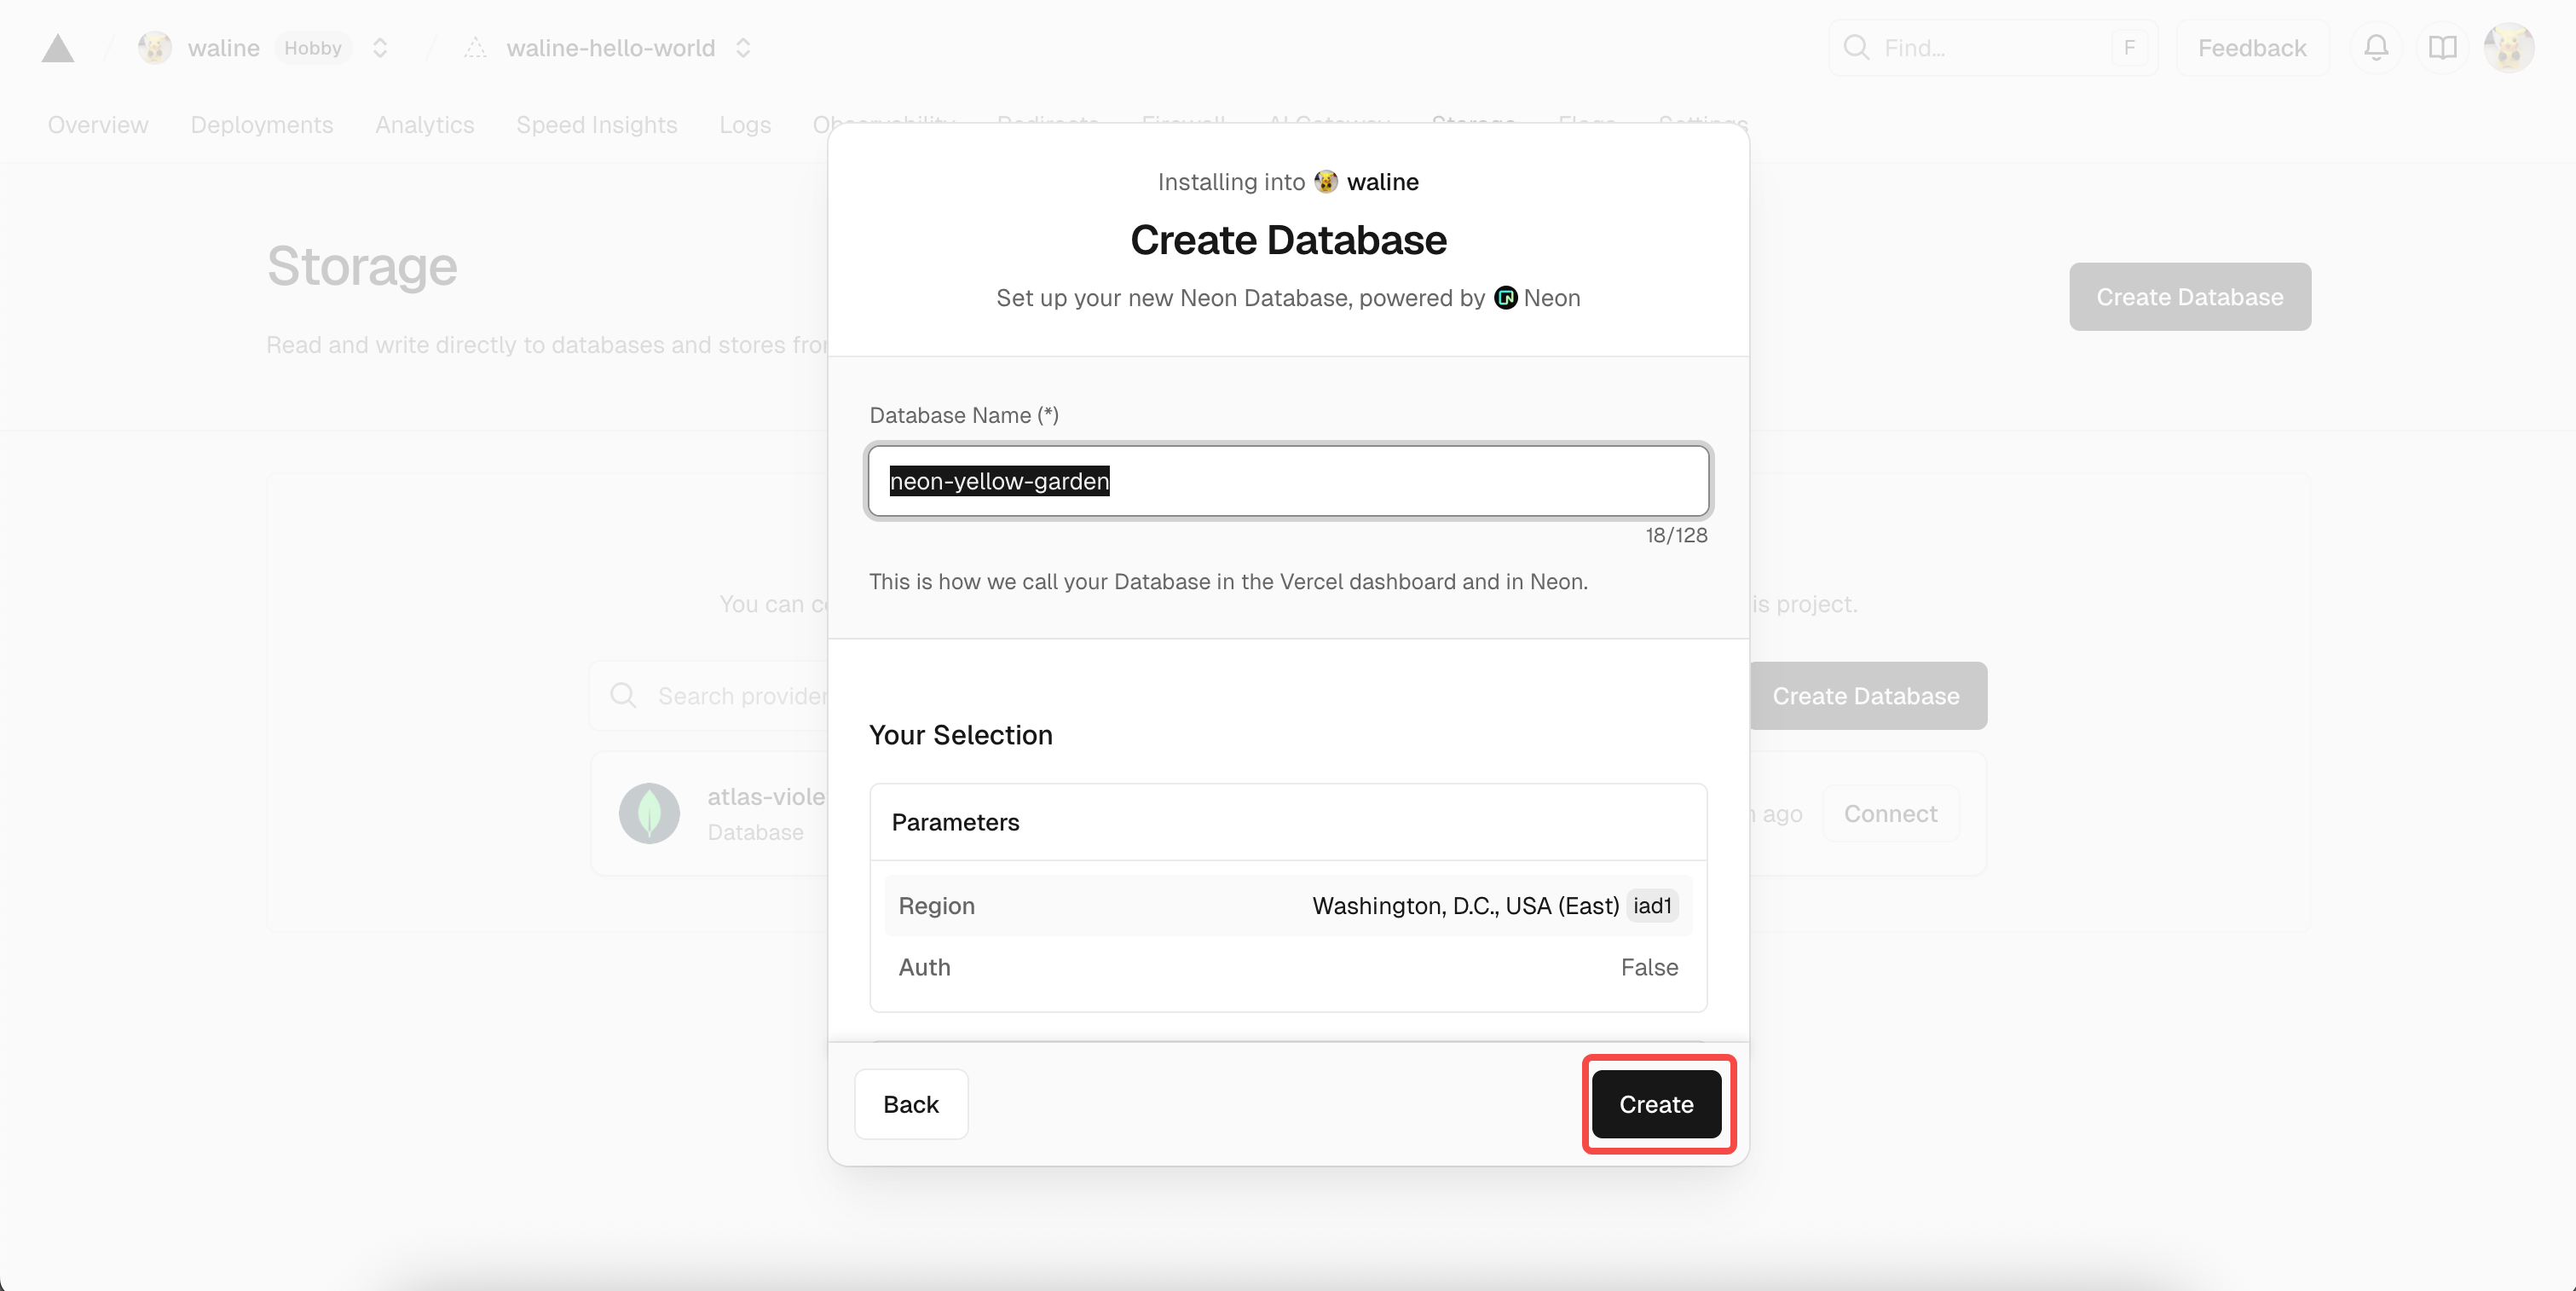
neon Now the database appears under
Storage. Click it and chooseOpen in Neonto jump to Neon. In Neon, selectSQL Editoron the left, paste the SQL from waline.pgsql into the editor, and clickRunto create tables.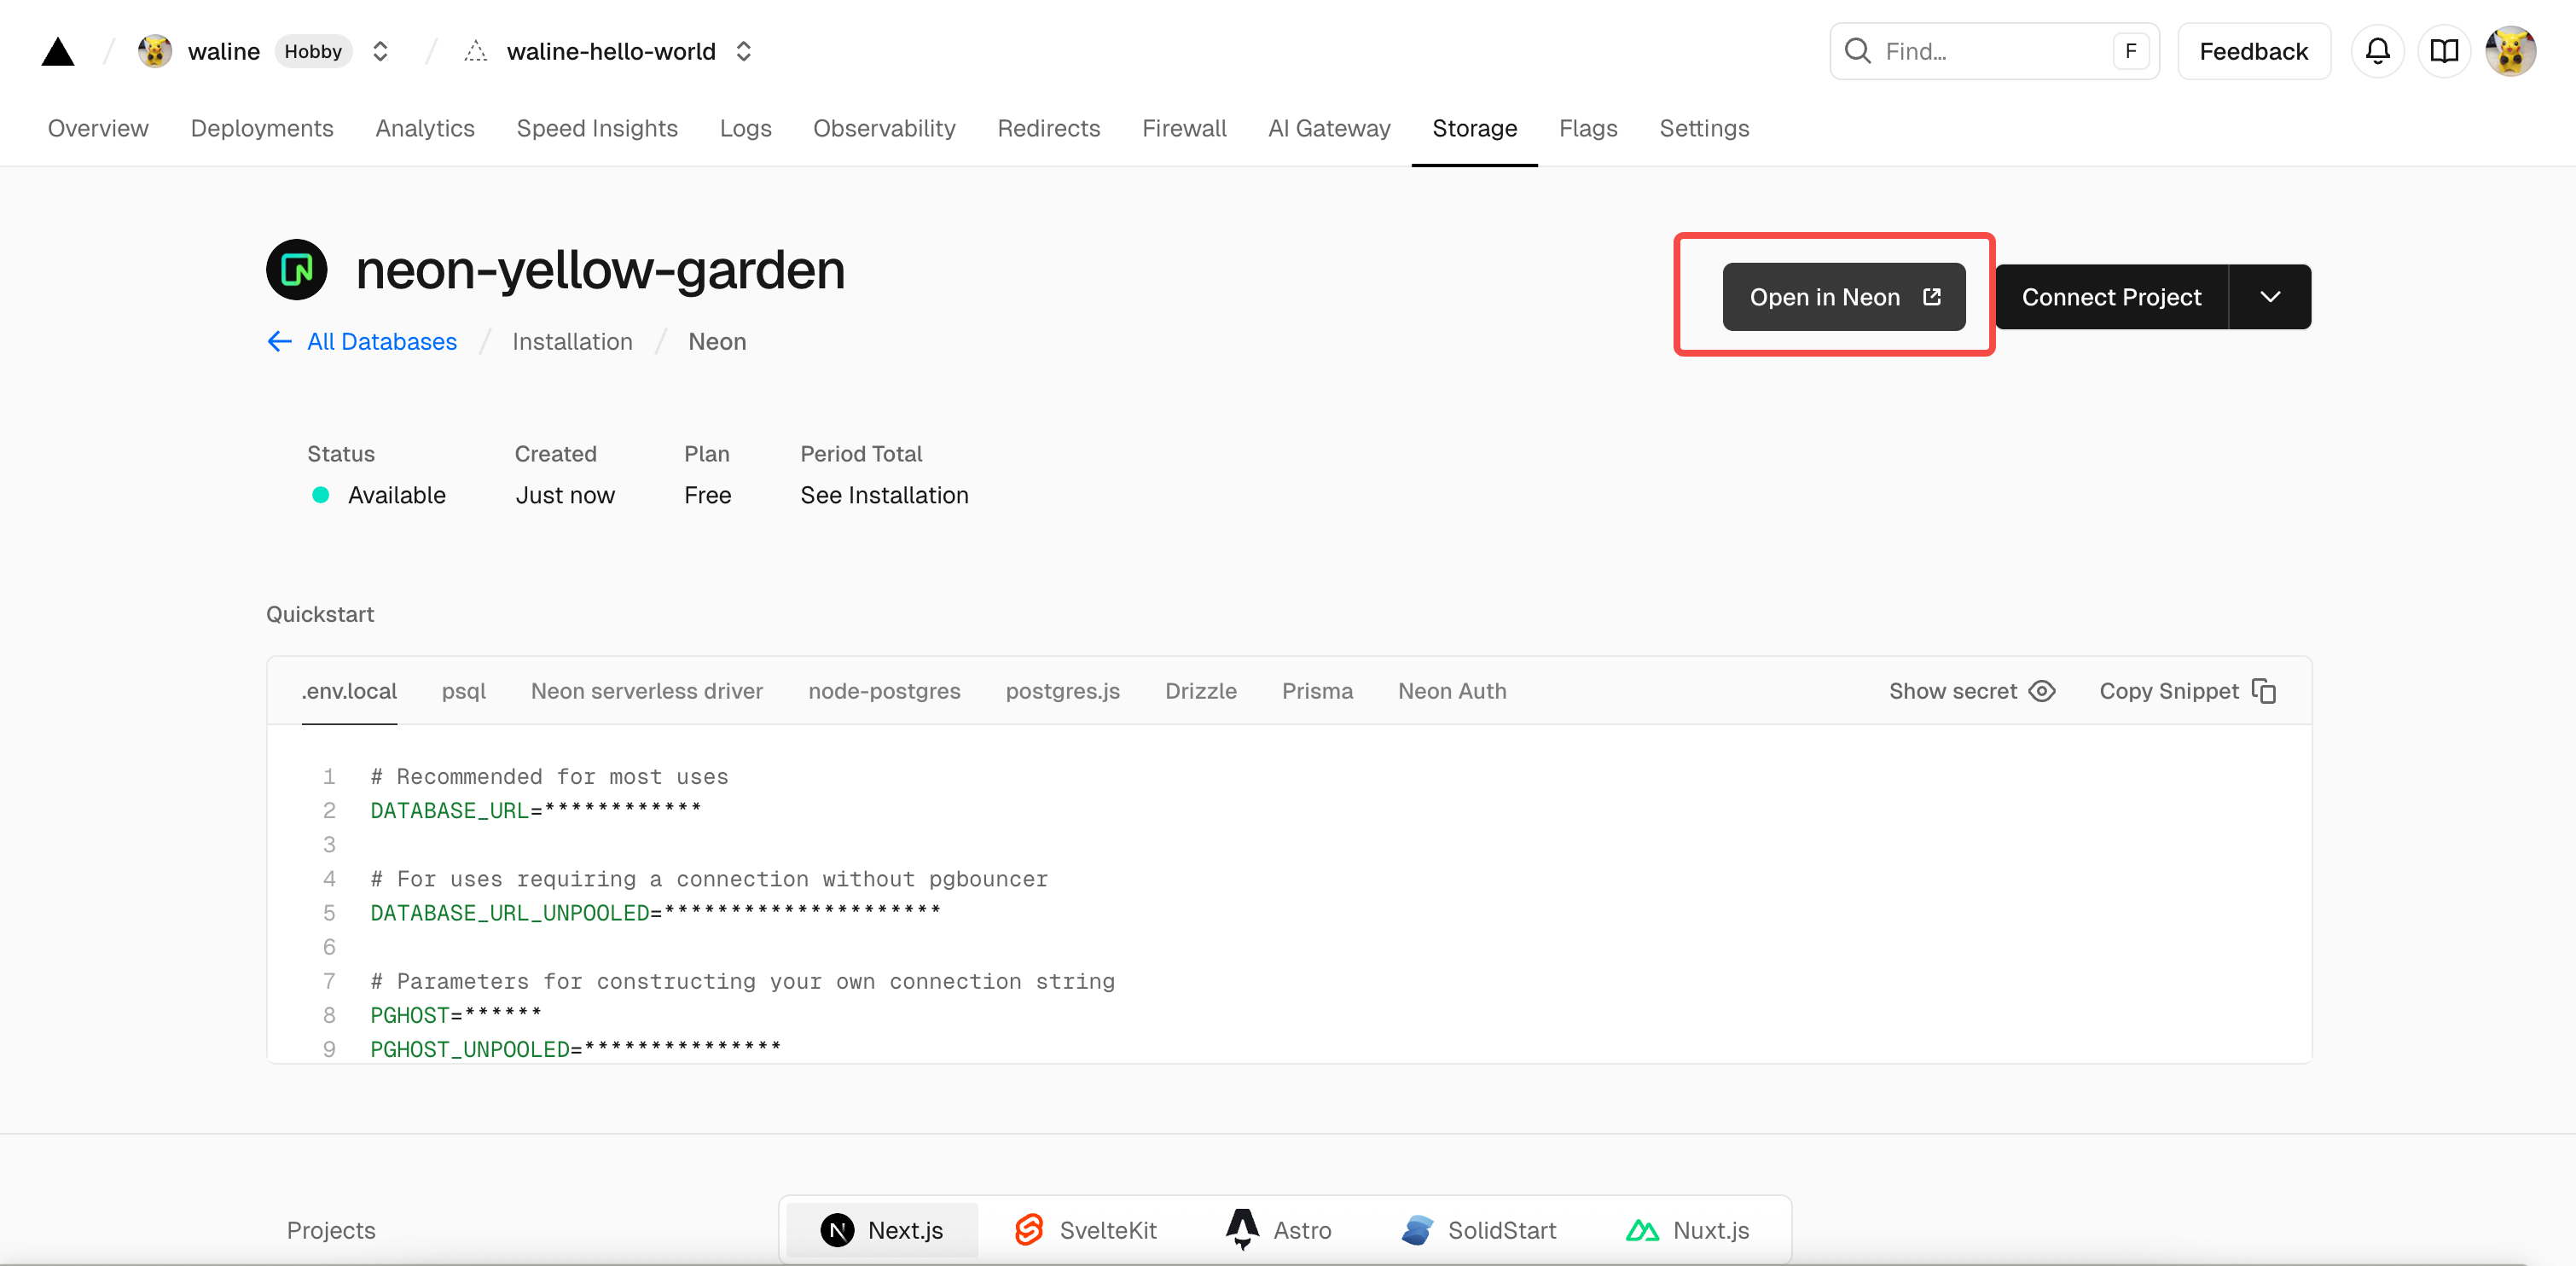
neon 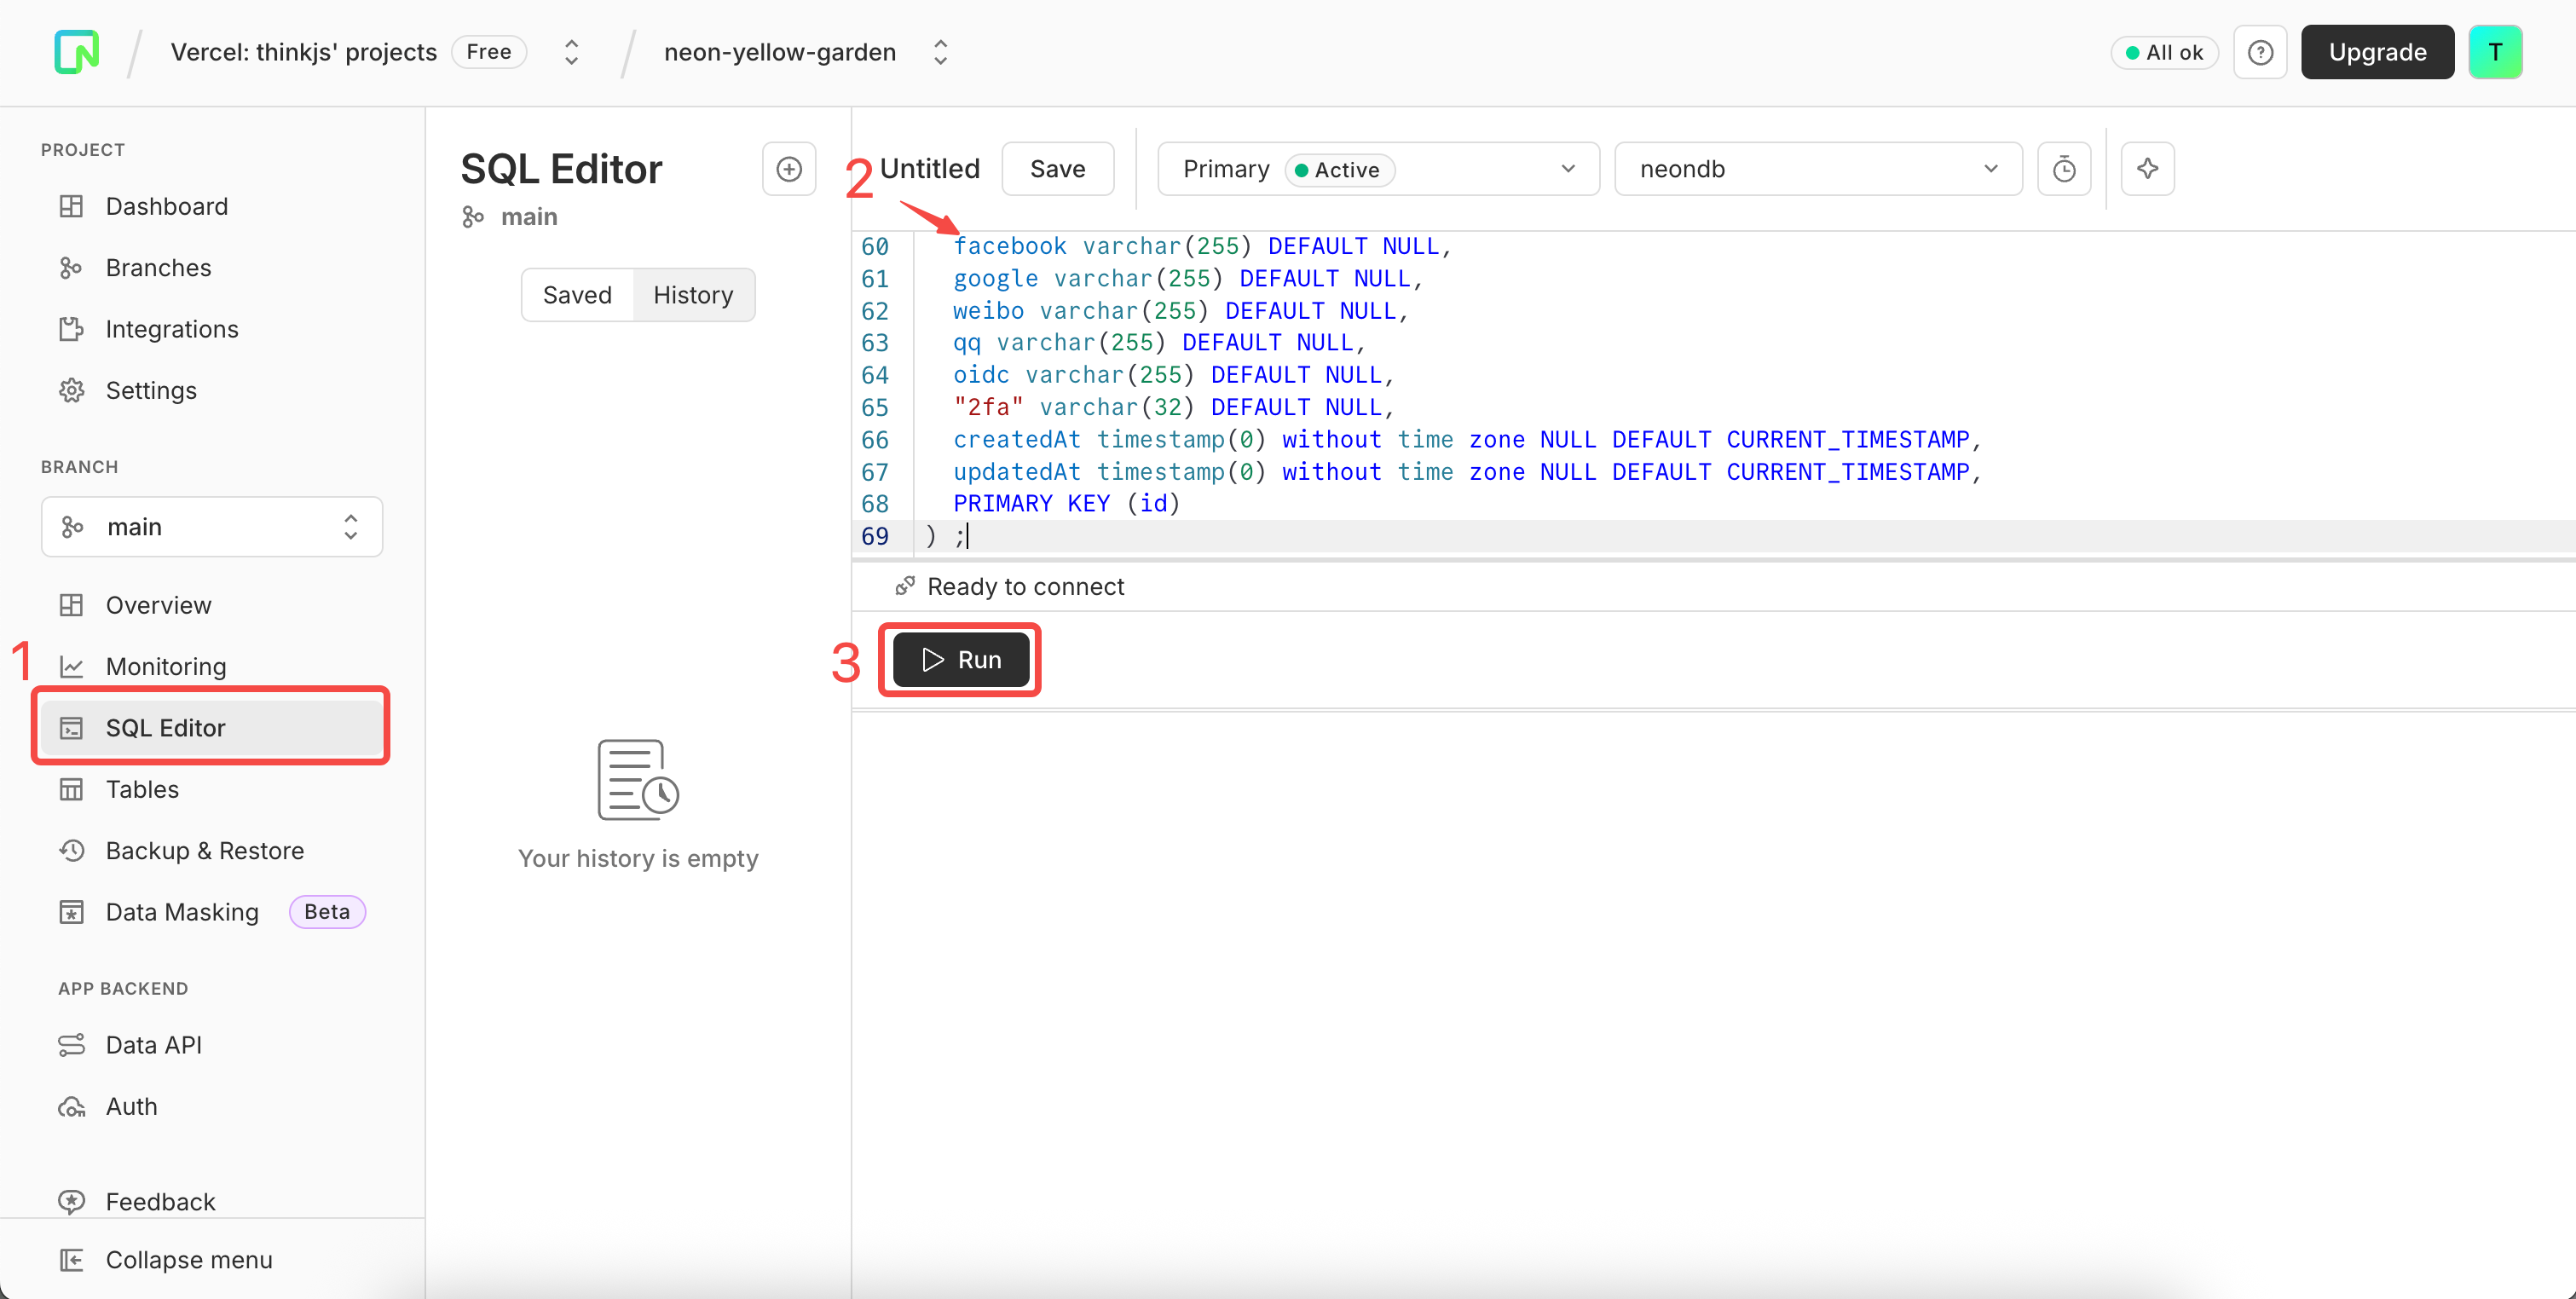
neon After a short while you should see a success message. Go back to Vercel, click
Deployments, then clickRedeployon the latest deployment to make the new database configuration take effect.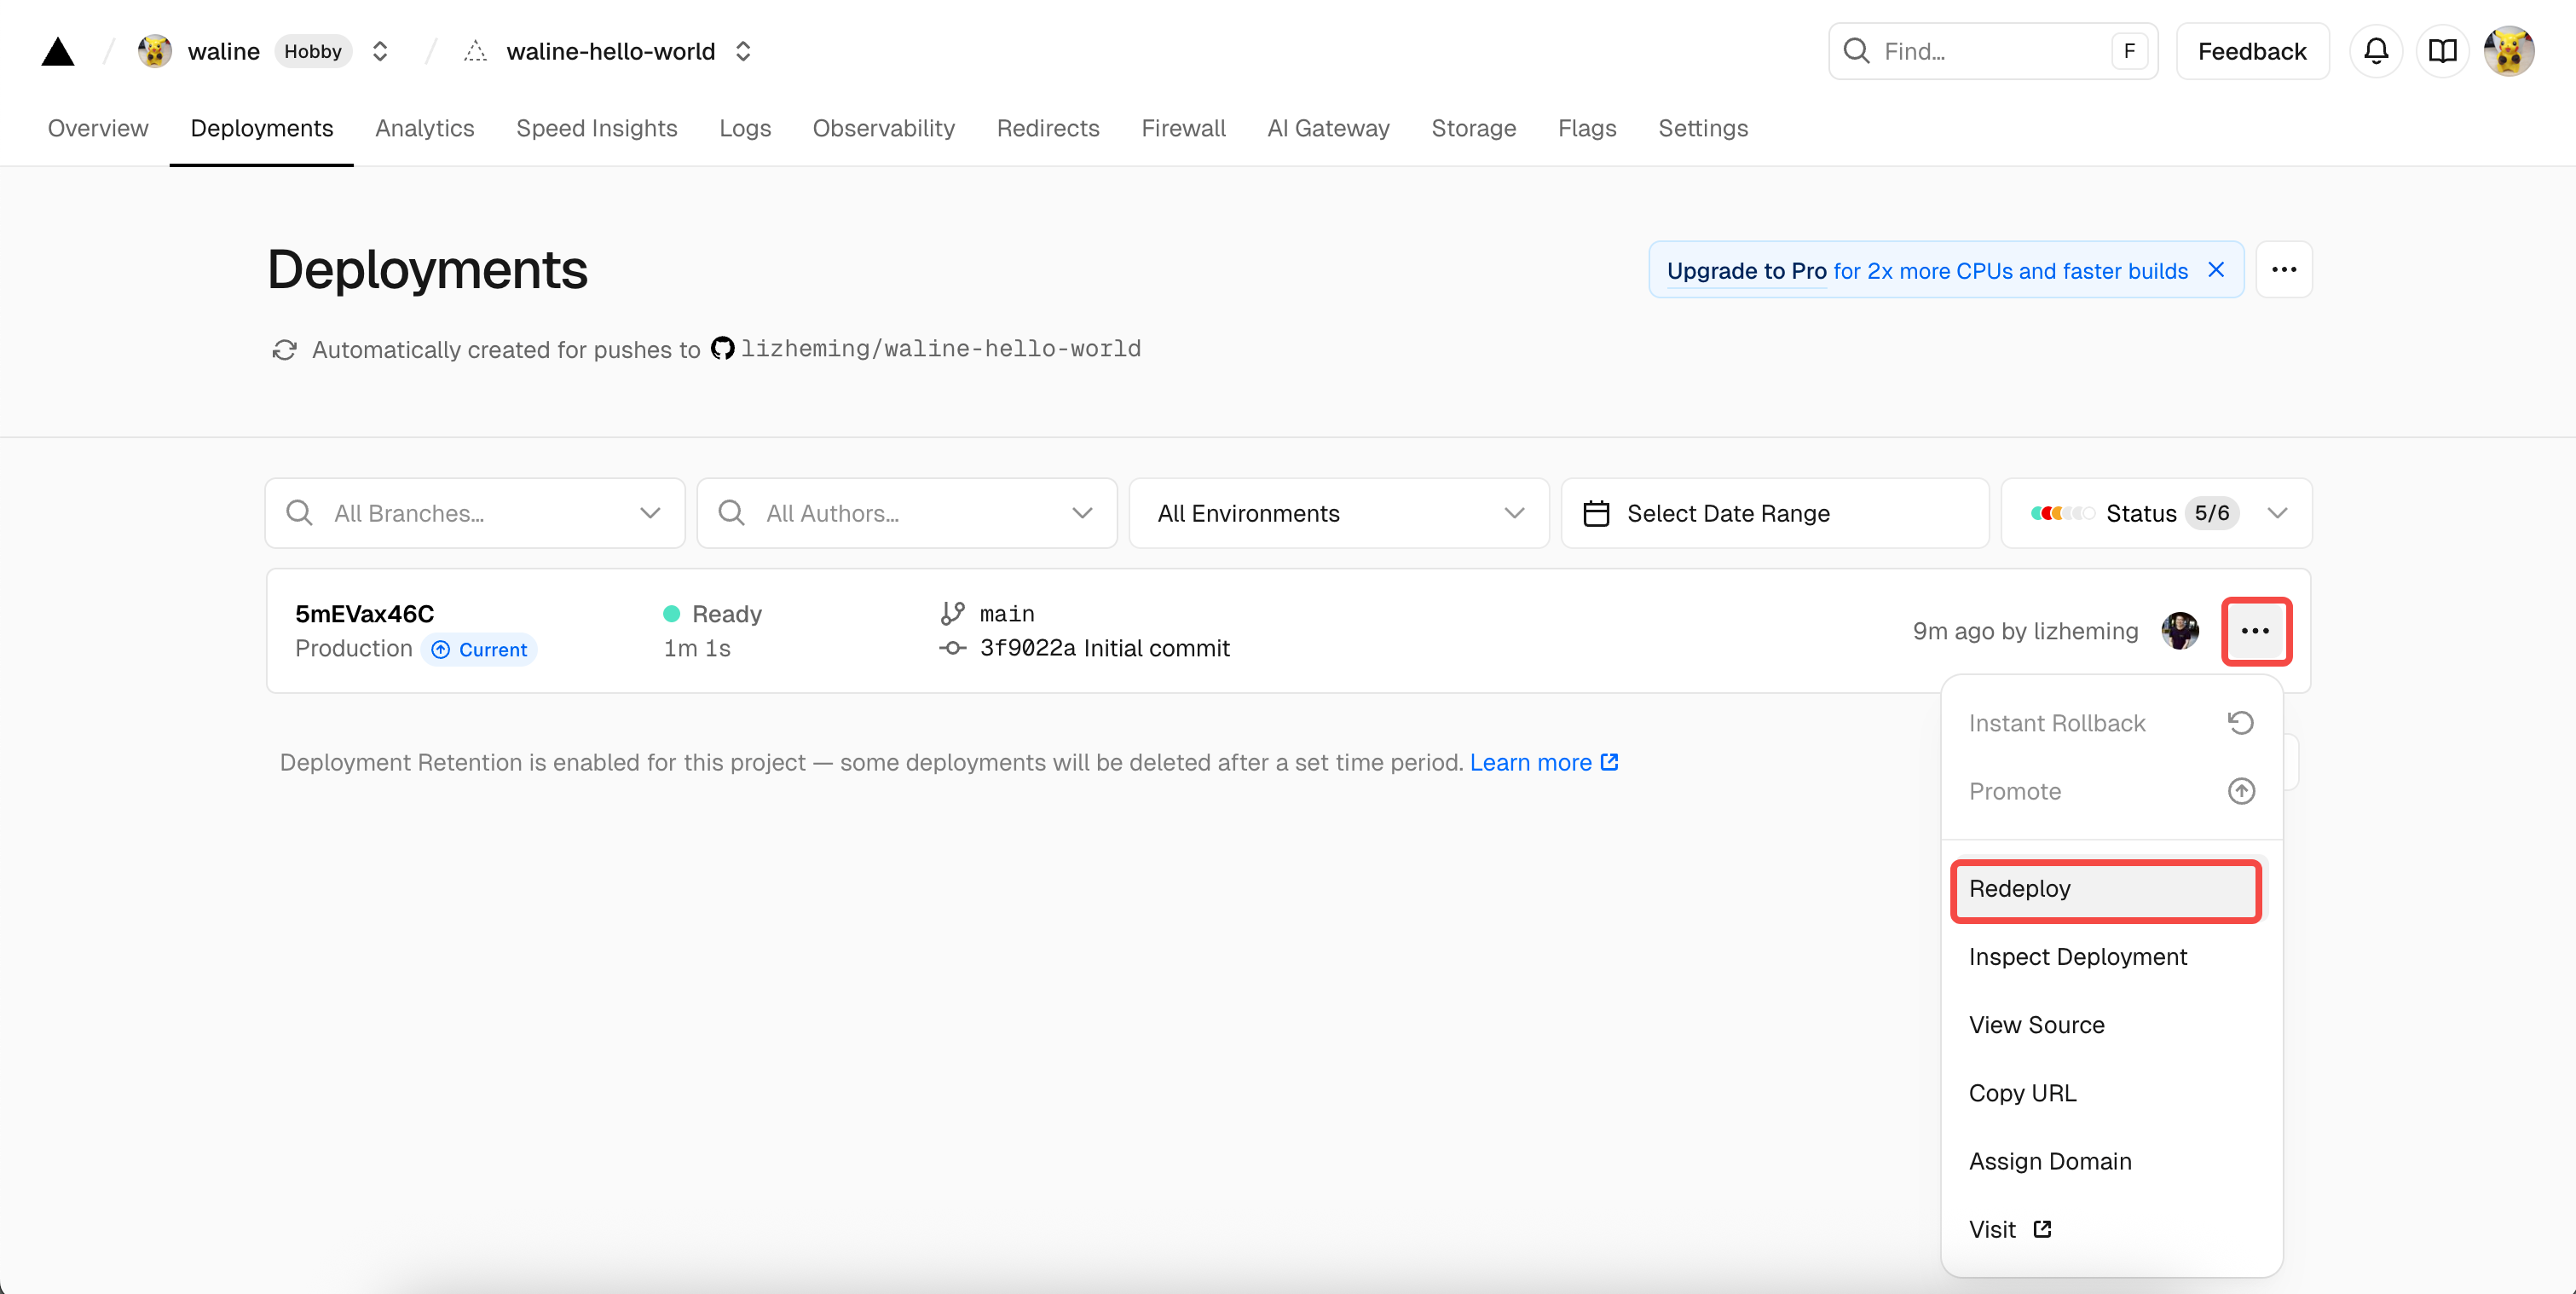
redeploy success Vercel will redirect to
Overviewand start deploying. WhenSTATUSbecomesReady, clickVisitto open the deployed site. This URL is your server address.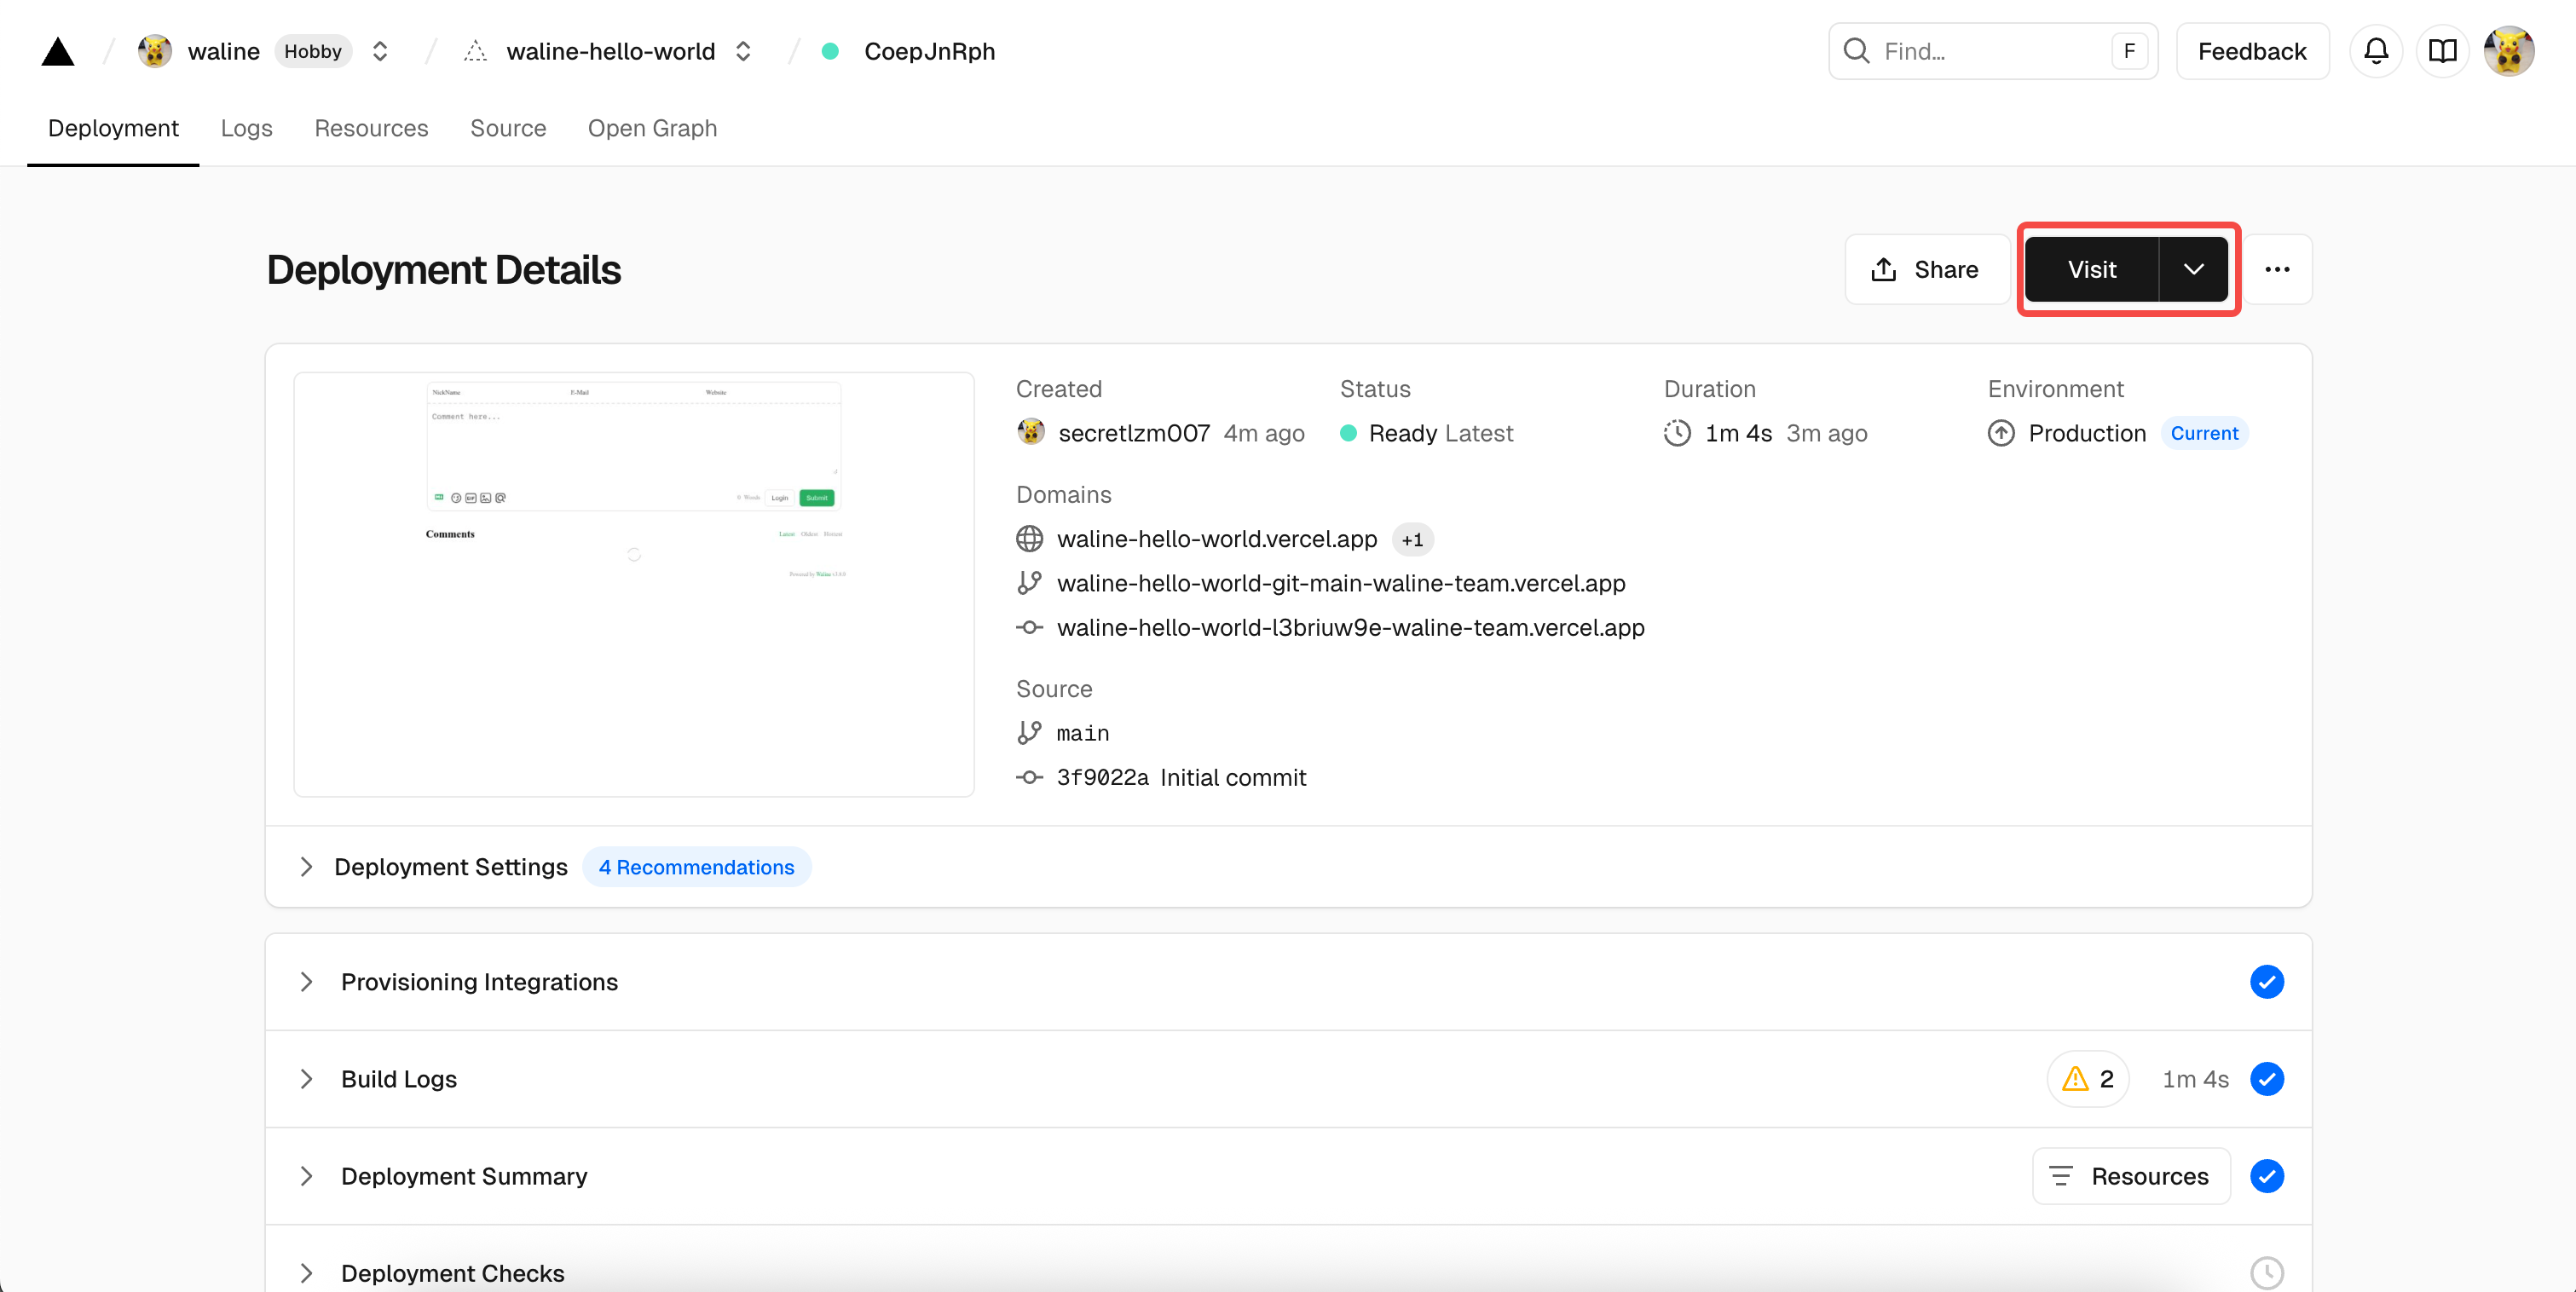
visit
Assign Domain
Click Settings - Domains to go to domain setting page.
Input domain you want to assign and click Add button.
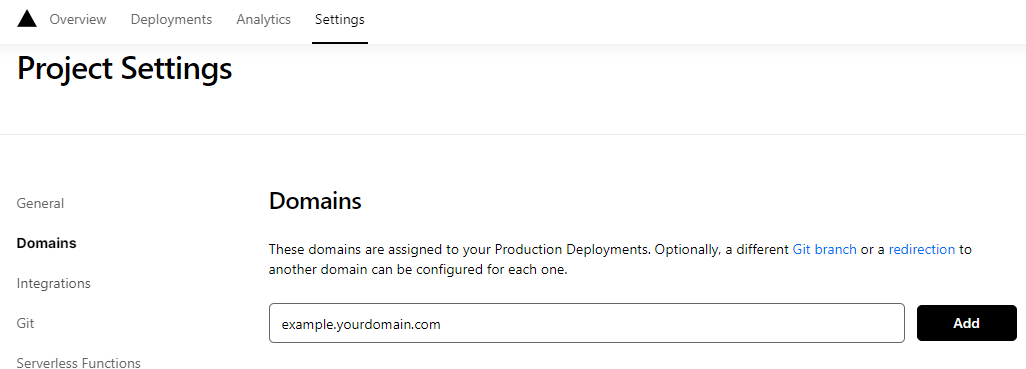
Add domain Add a new
CNAMErecord in your domain service server.Type Name Value CNAME example cname.vercel-dns.com You can use your own domain to visit Waline after it takes effect. 🎉
- Comment system: example.your-domain.com
- Admin panel: example.your-domain.com/ui

success
HTML Import
Set up as follows in your webpage:
- Import Waline styles from
https://unpkg.com/@waline/client@v3/dist/waline.css. - Create a
<script>tag that usesinit()fromhttps://unpkg.com/@waline/client@v3/dist/waline.js, and pass required optionselandserverURL.elis the element used to render Waline. It can be a CSS selector string or an HTMLElement.serverURLis your server address obtained in the previous step.
<head>
  <!-- ... -->
  <link rel="stylesheet" href="https://unpkg.com/@waline/client@v3/dist/waline.css" />
  <!-- ... -->
</head>
<body>
  <!-- ... -->
  <div id="waline"></div>
  <script type="module">
    import { init } from 'https://unpkg.com/@waline/client@v3/dist/waline.js';

    init({
      el: '#waline',
      serverURL: 'https://your-domain.vercel.app',
    });
  </script>
</body>
Comment Admin
- After deployment, visit
<serverURL>/ui/registerto register. The first registered user becomes the administrator. - After logging in, the administrator can manage comments: edit, mark, or delete.
- Users can also register via the comment box. After login they will be redirected to their profile page.