Get Started
Welcome to Waline. In just a few steps, you can enable Waline to provide comments and pageviews on your site.
Server Deploy
Click the button above to go to Vercel and deploy the server.
Note
If you are not logged in, Vercel will prompt you to sign up or log in. Please use your GitHub account for quick login.
Enter a Vercel project name you like and click
Createto continue: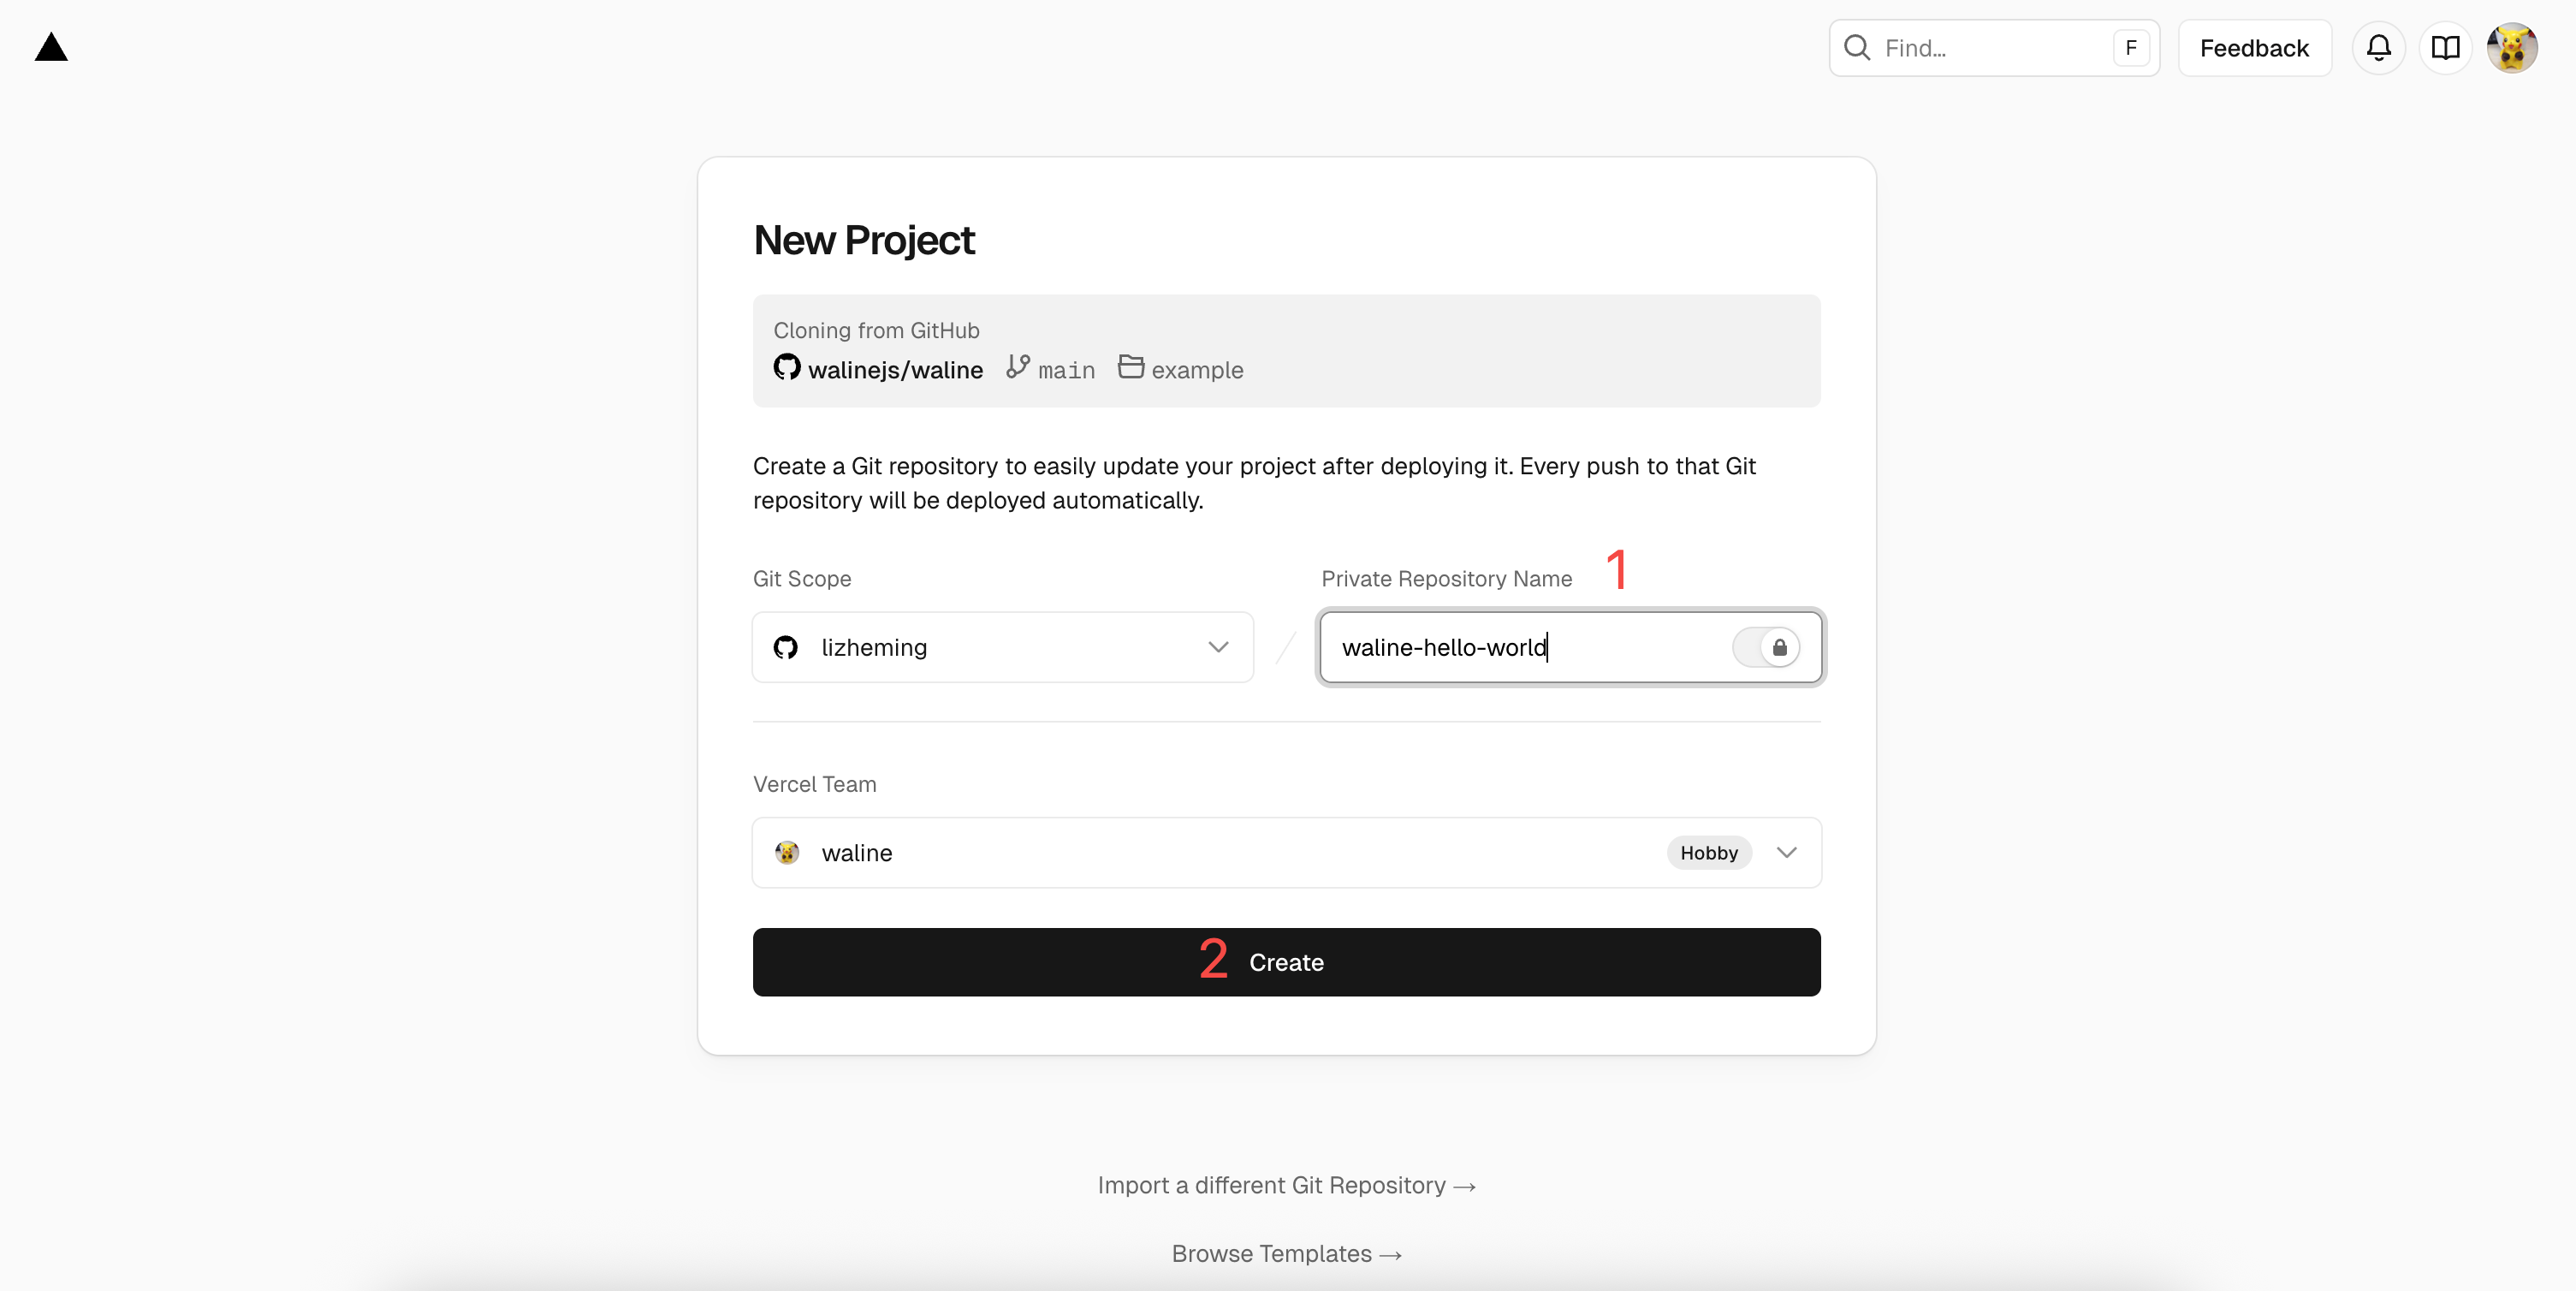
create Vercel will now create and initialize a new repository based on the Waline template. The repository name will be the project name you just entered.
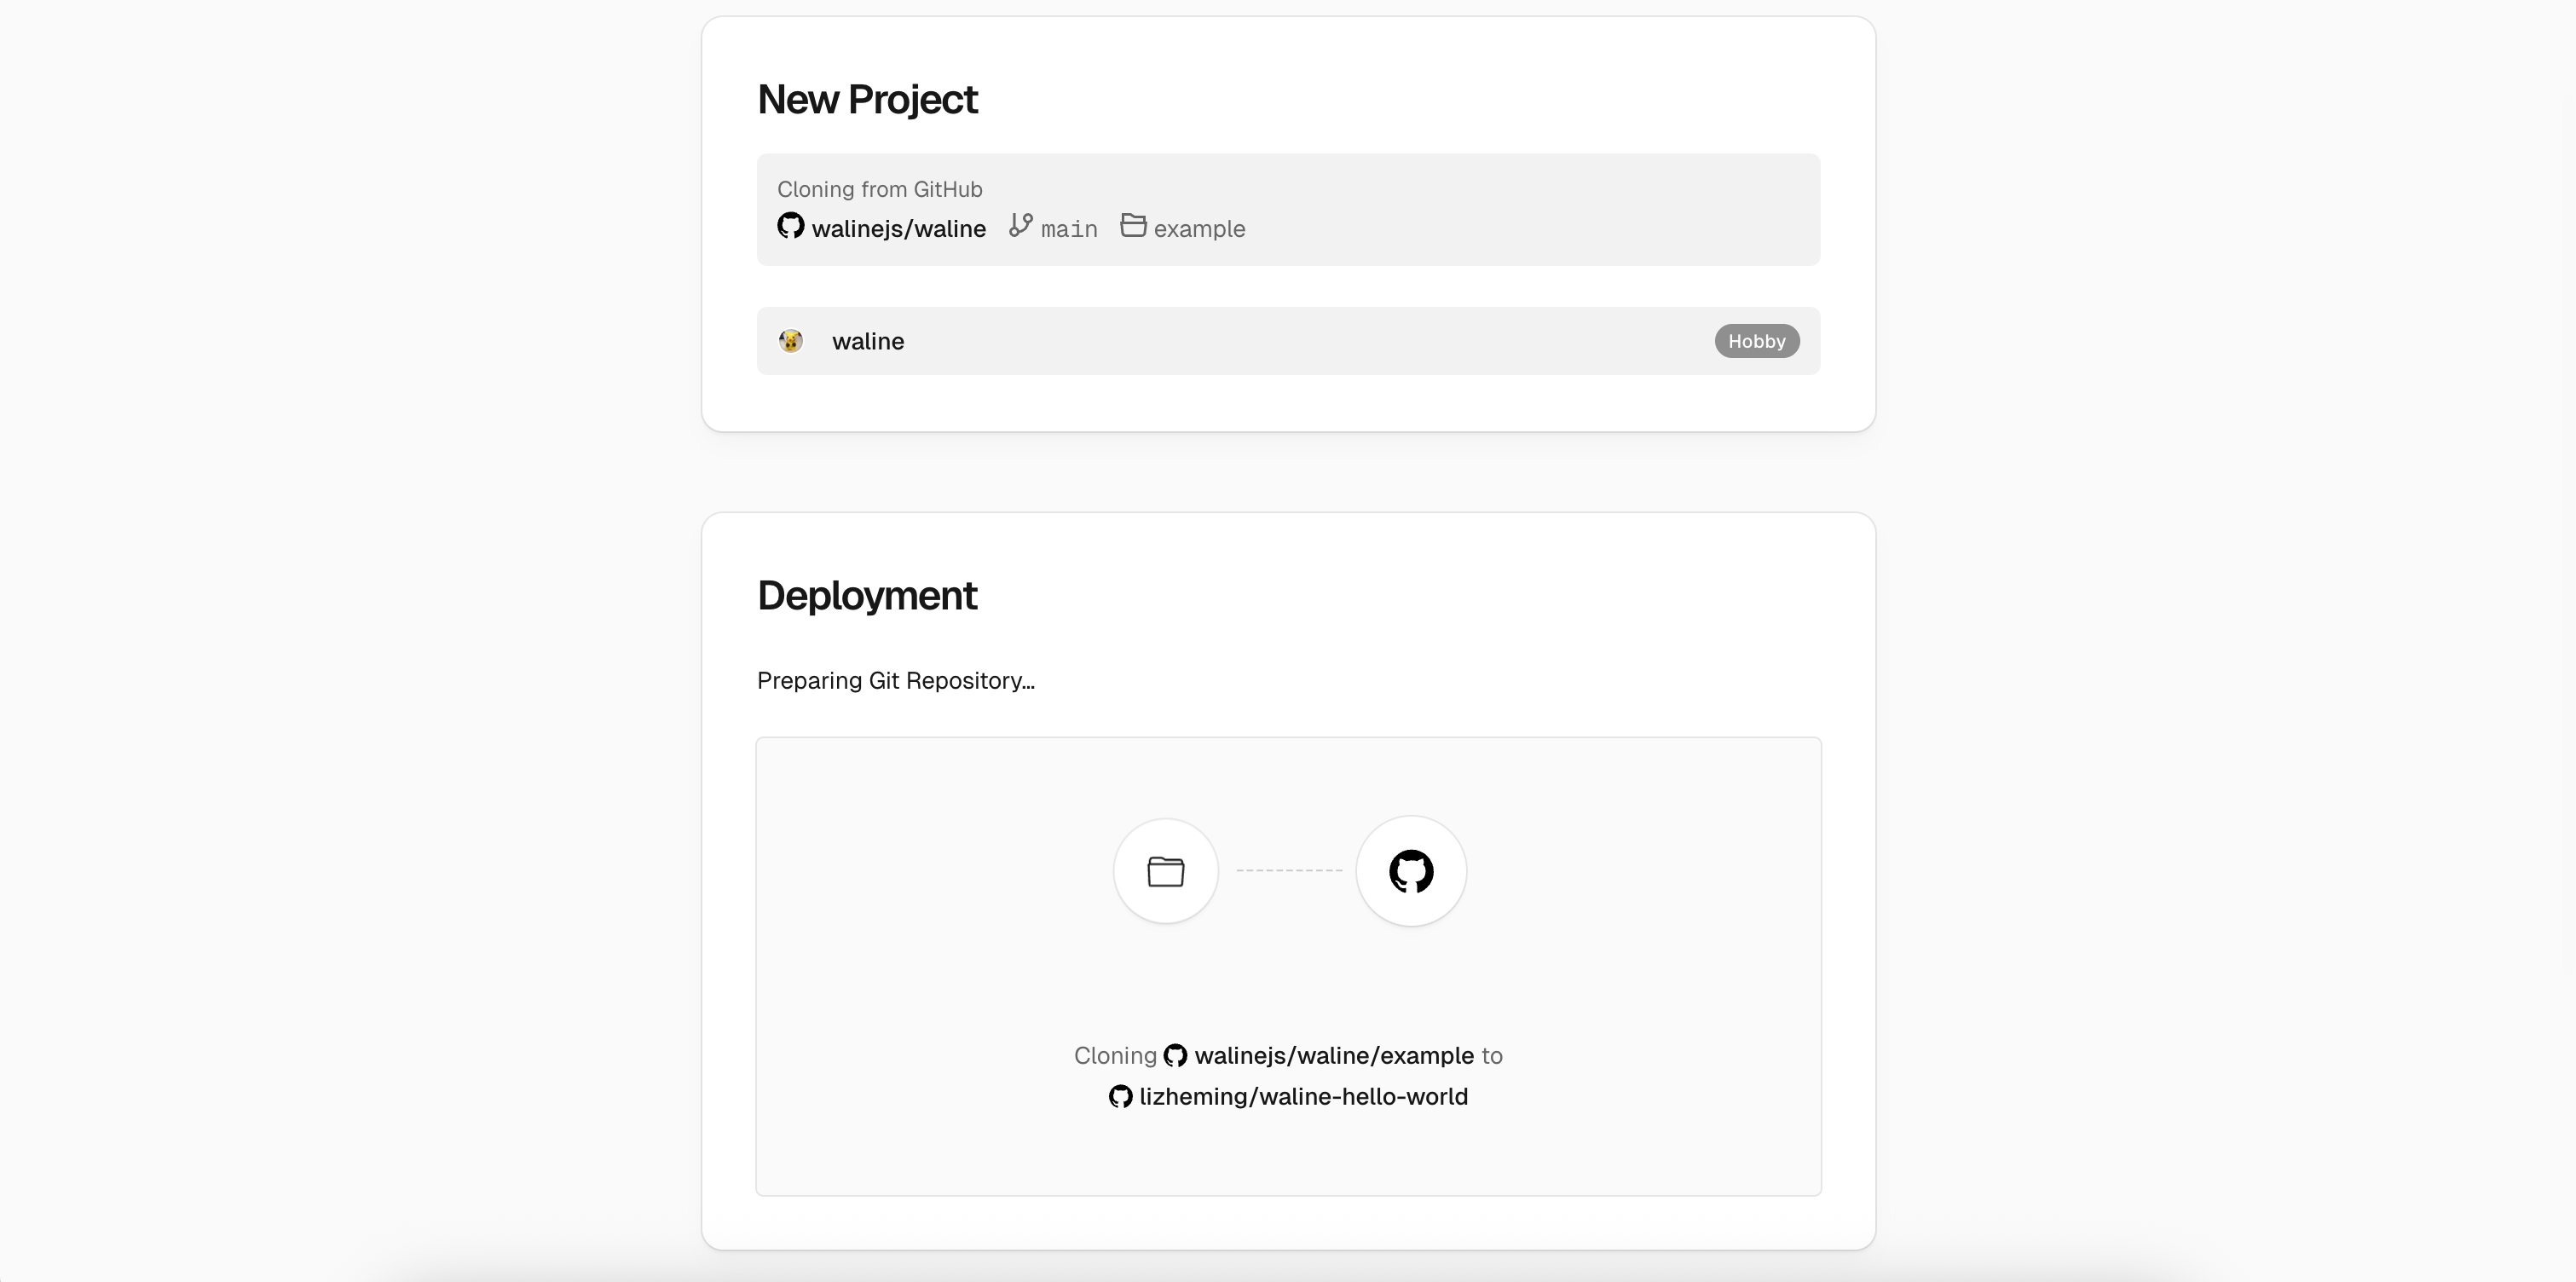
deploy After one or two minutes, fireworks will appear on the screen to celebrate a successful deployment. Click
Go to Dashboardto jump to the application dashboard.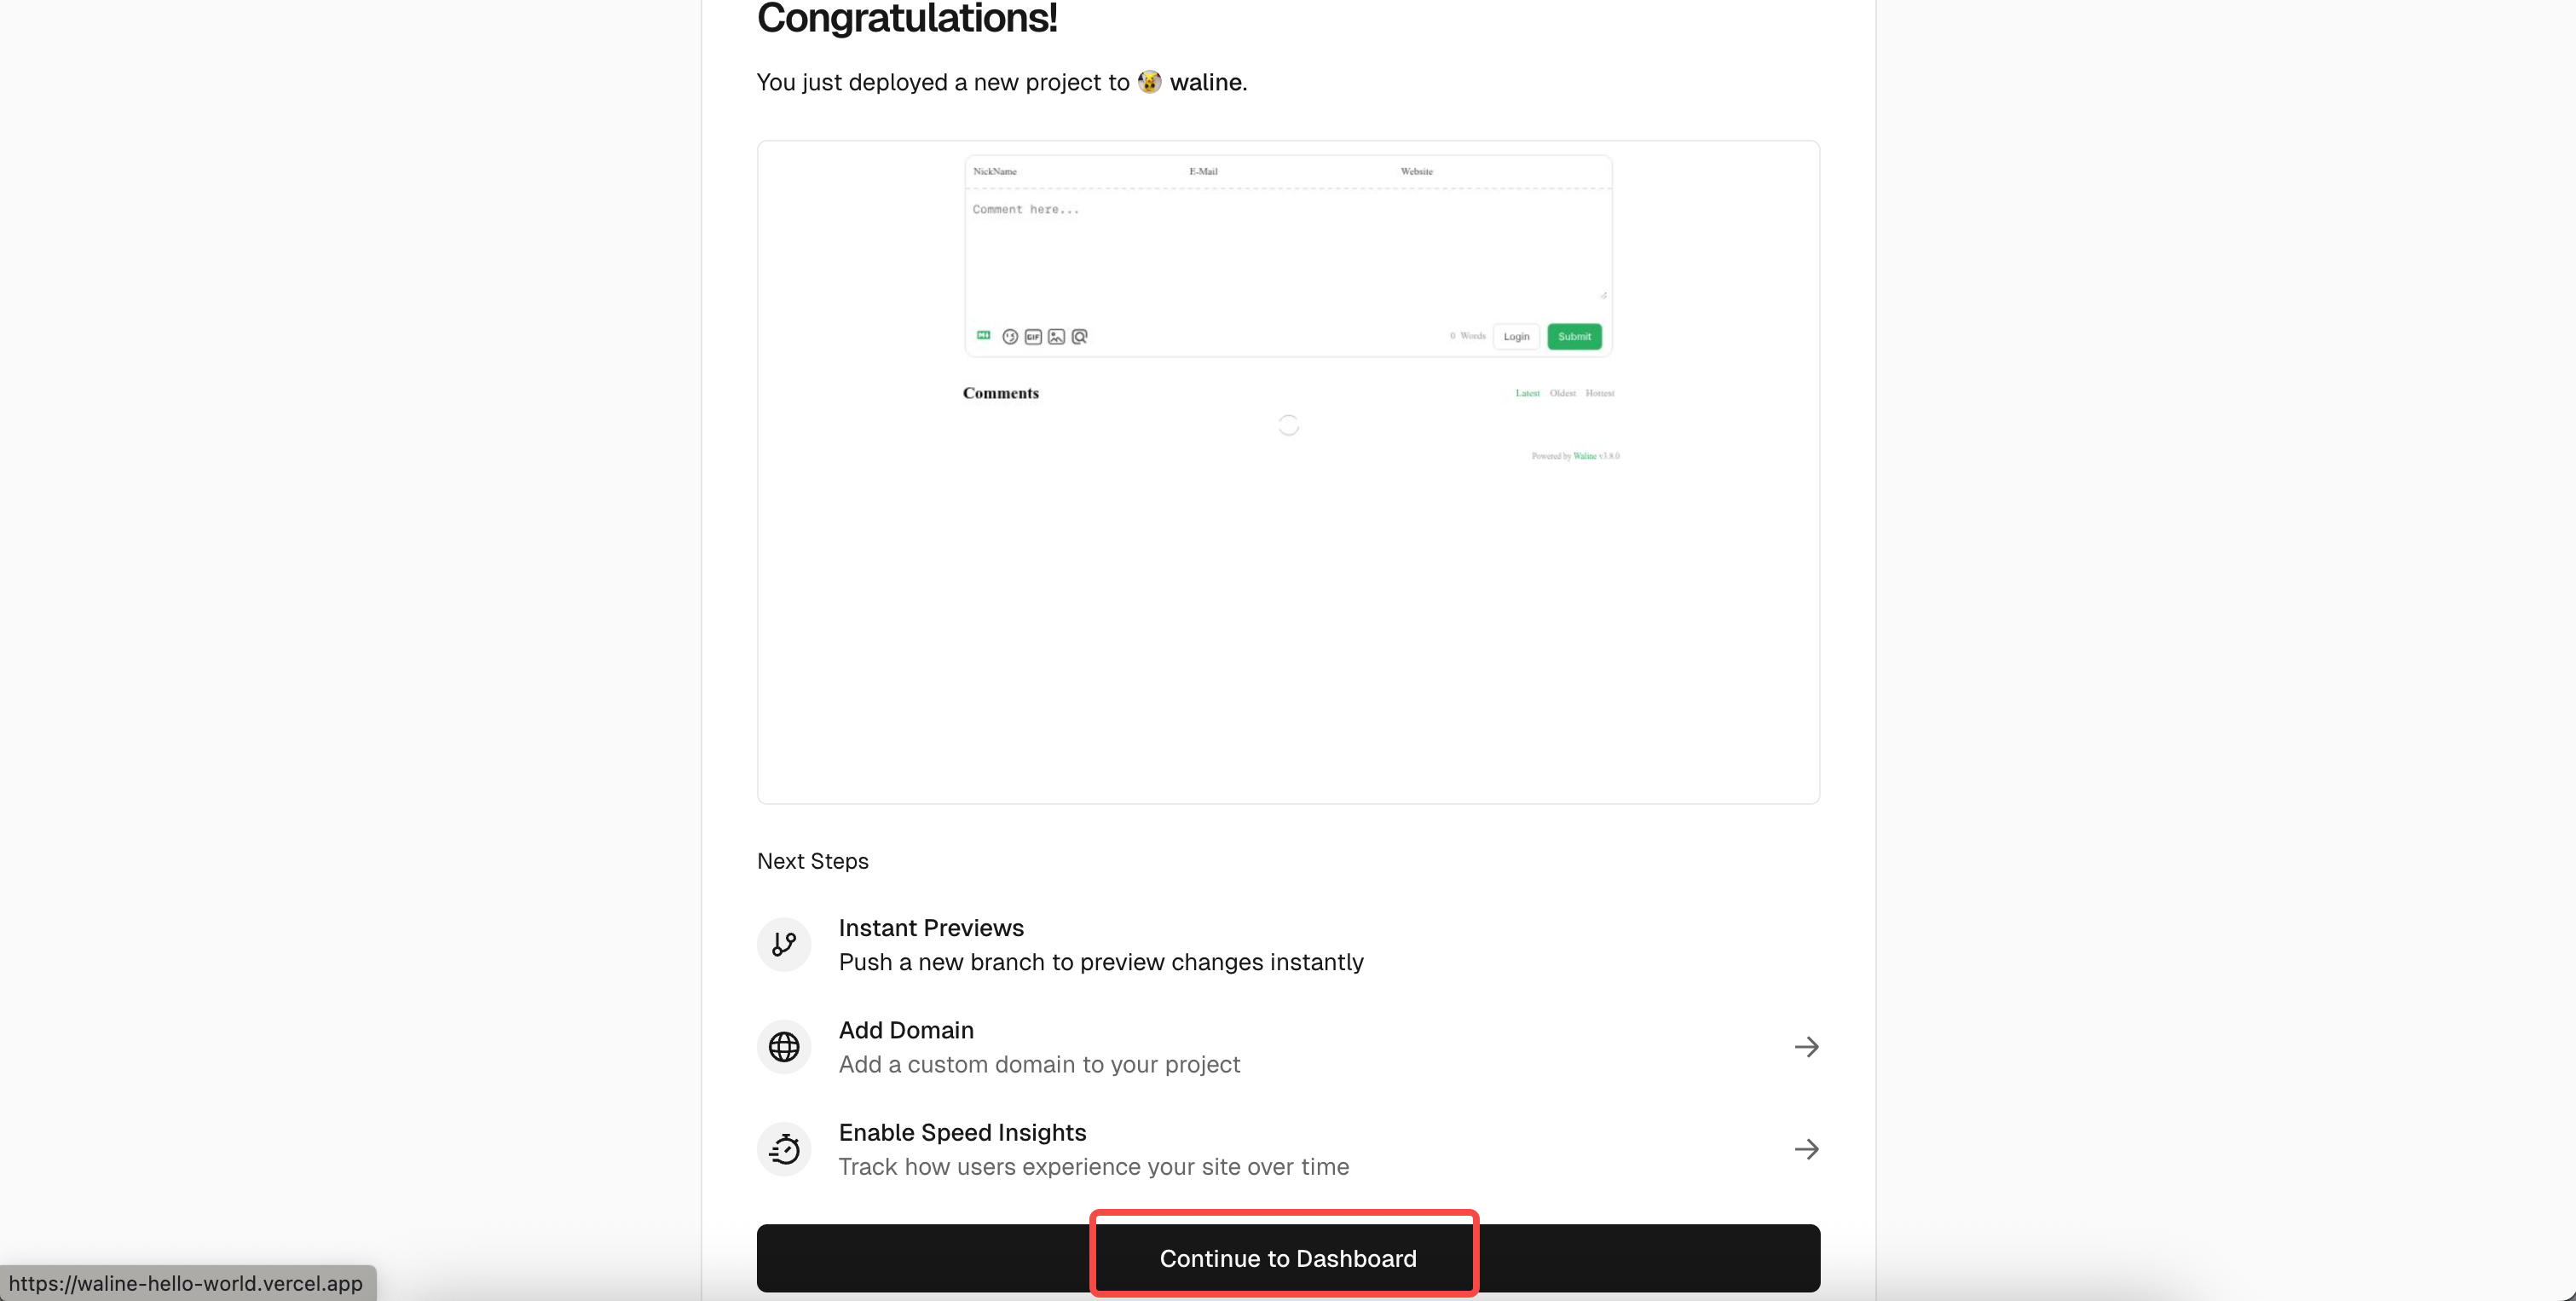
deploy
Create a Database
Click
Storageat the top to enter the storage configuration page, then chooseCreate Database. SelectNeonas theMarketplace Database Providers, and clickContinueto proceed.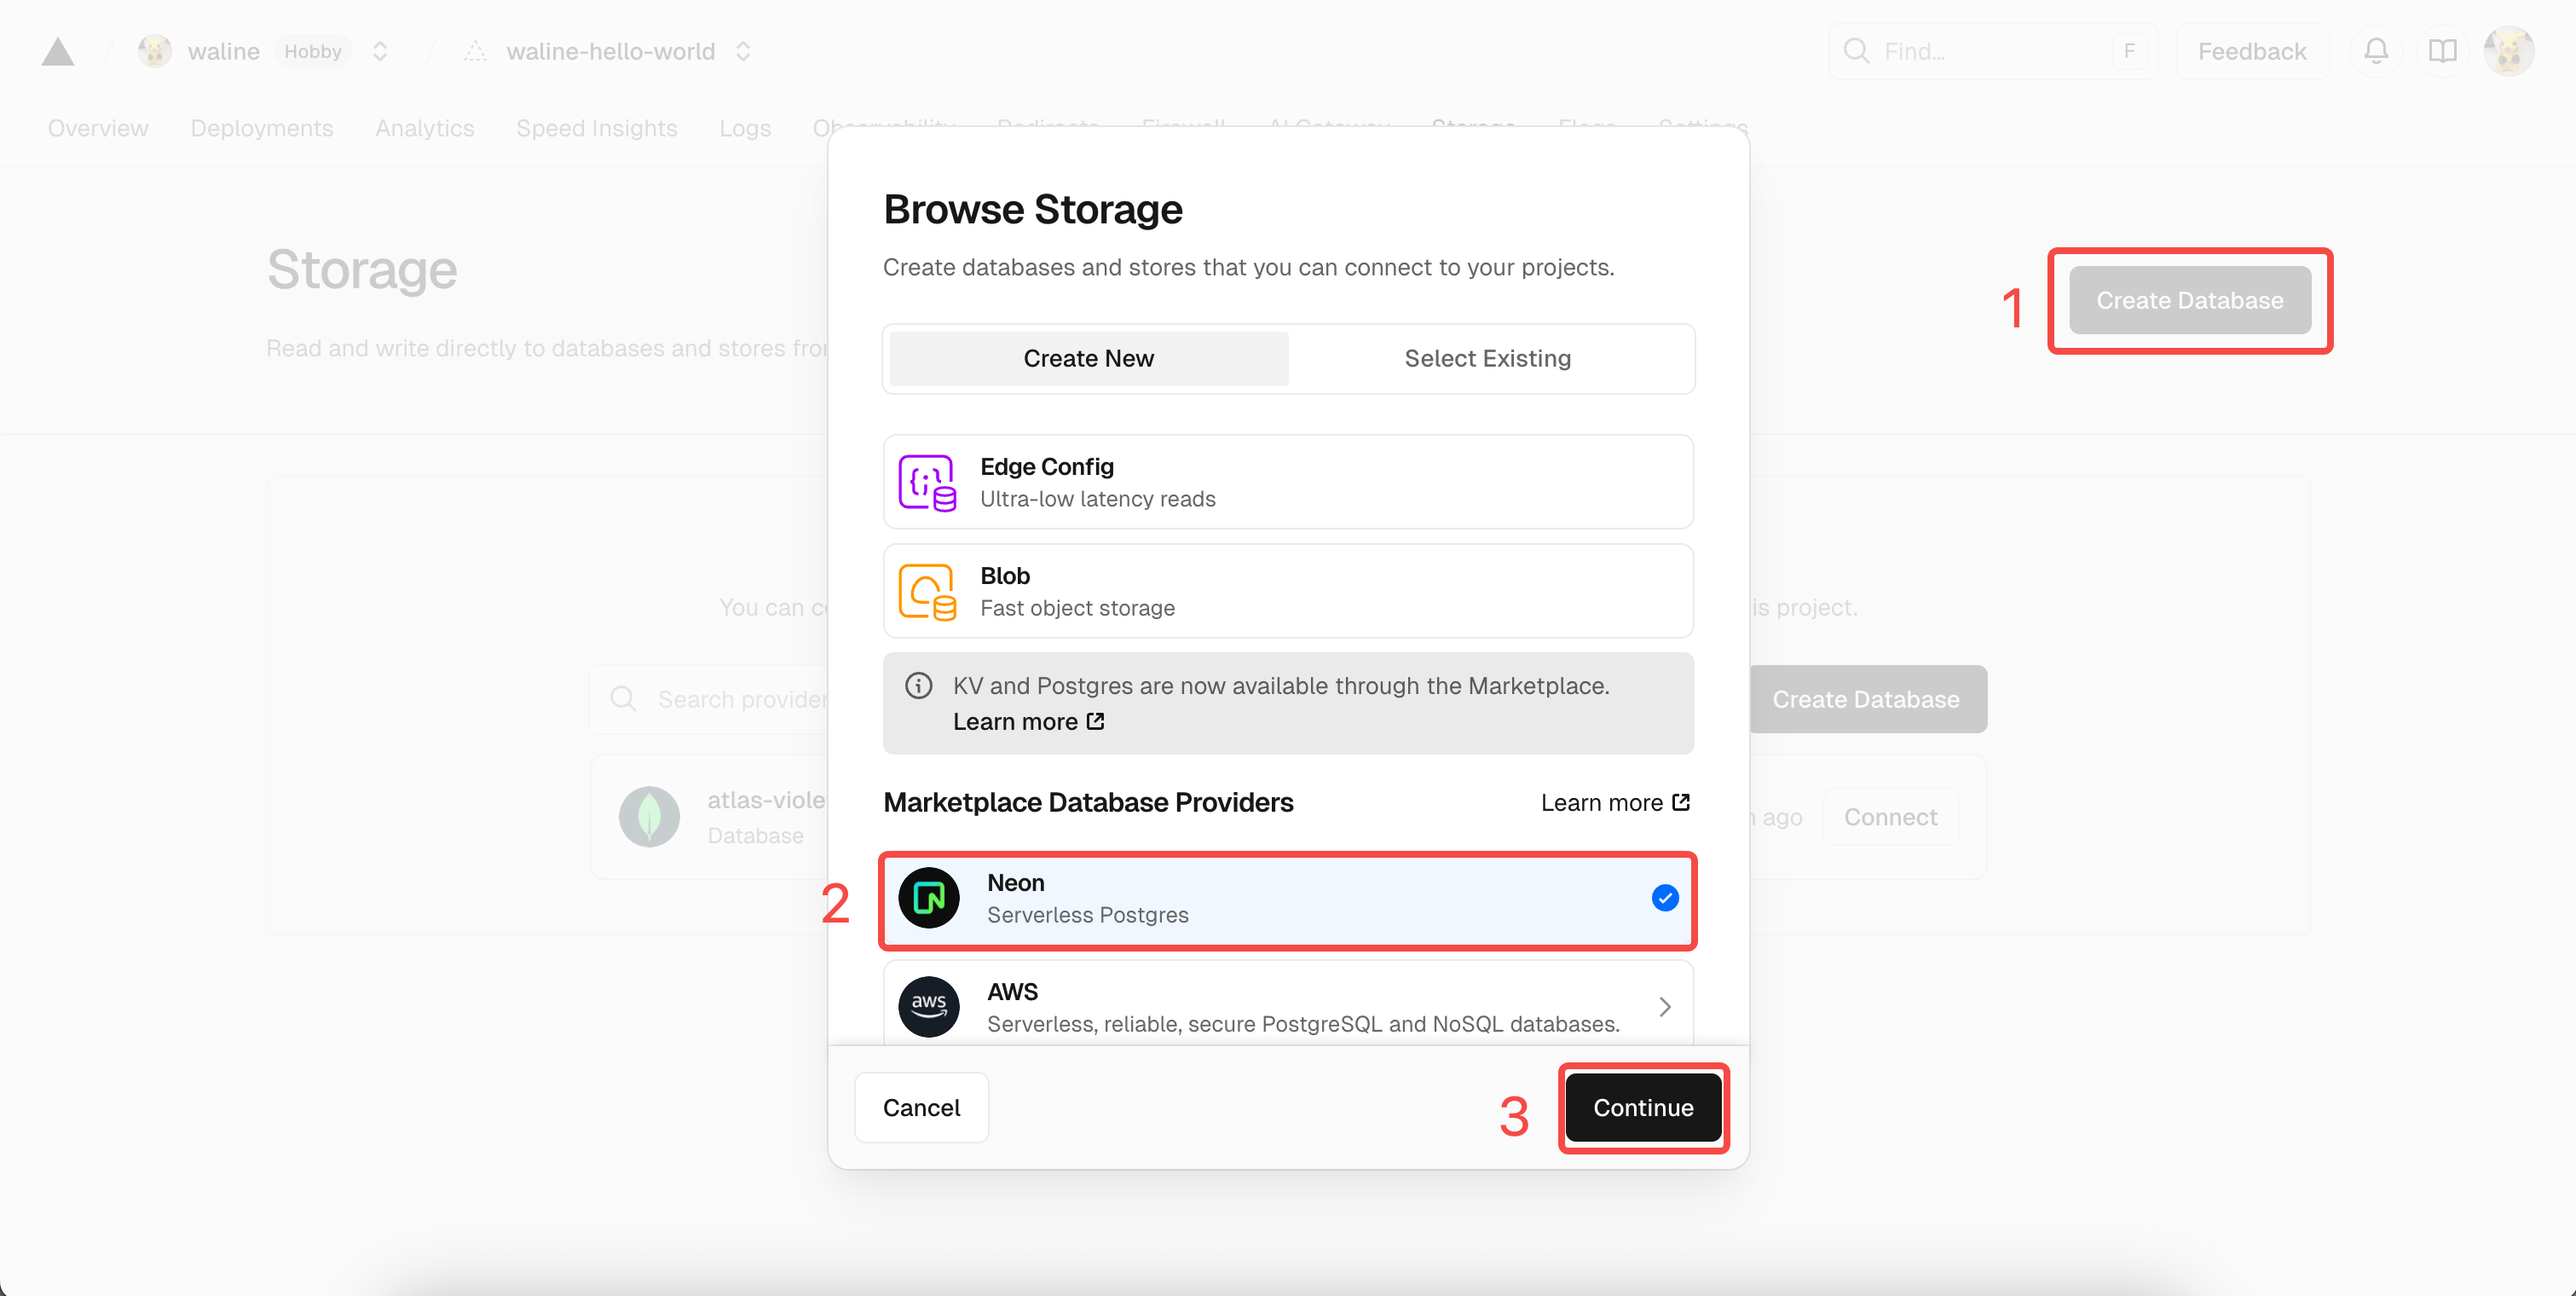
neon You will be prompted to create a Neon account. Click
Accept and Createto accept and create it. Next, you will choose the database plan, including region and quota. You can leave everything as default and clickContinue.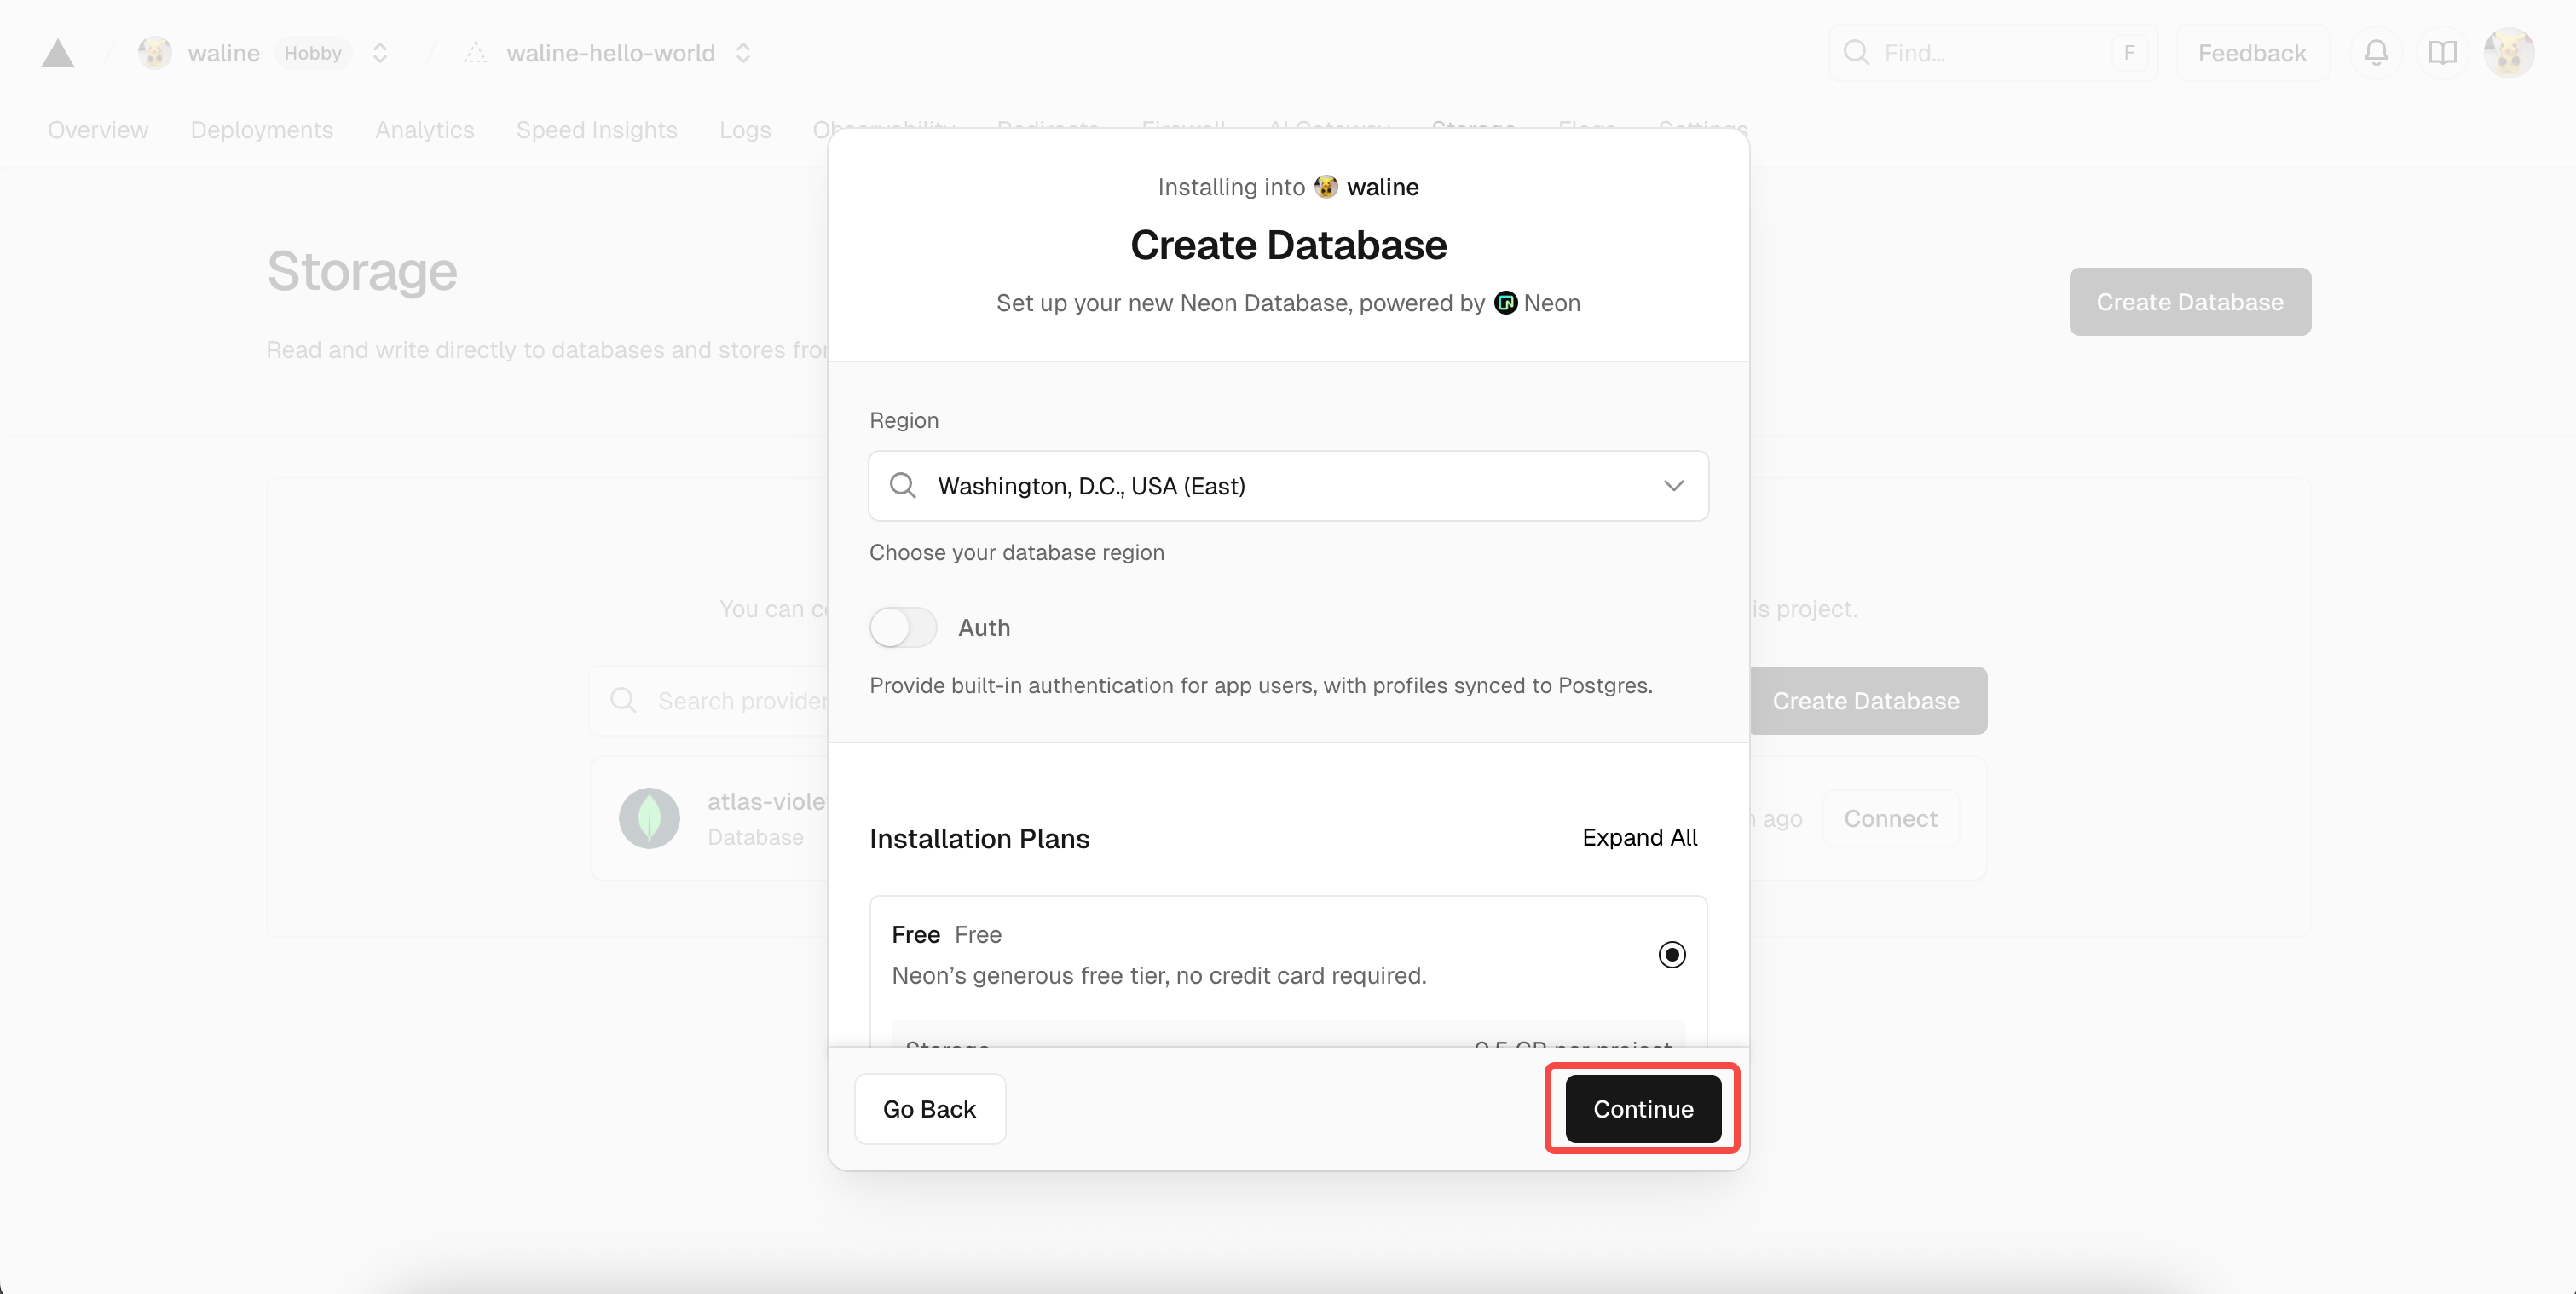
neon You will then be asked to define the database name. You can also leave it unchanged and click
Continue.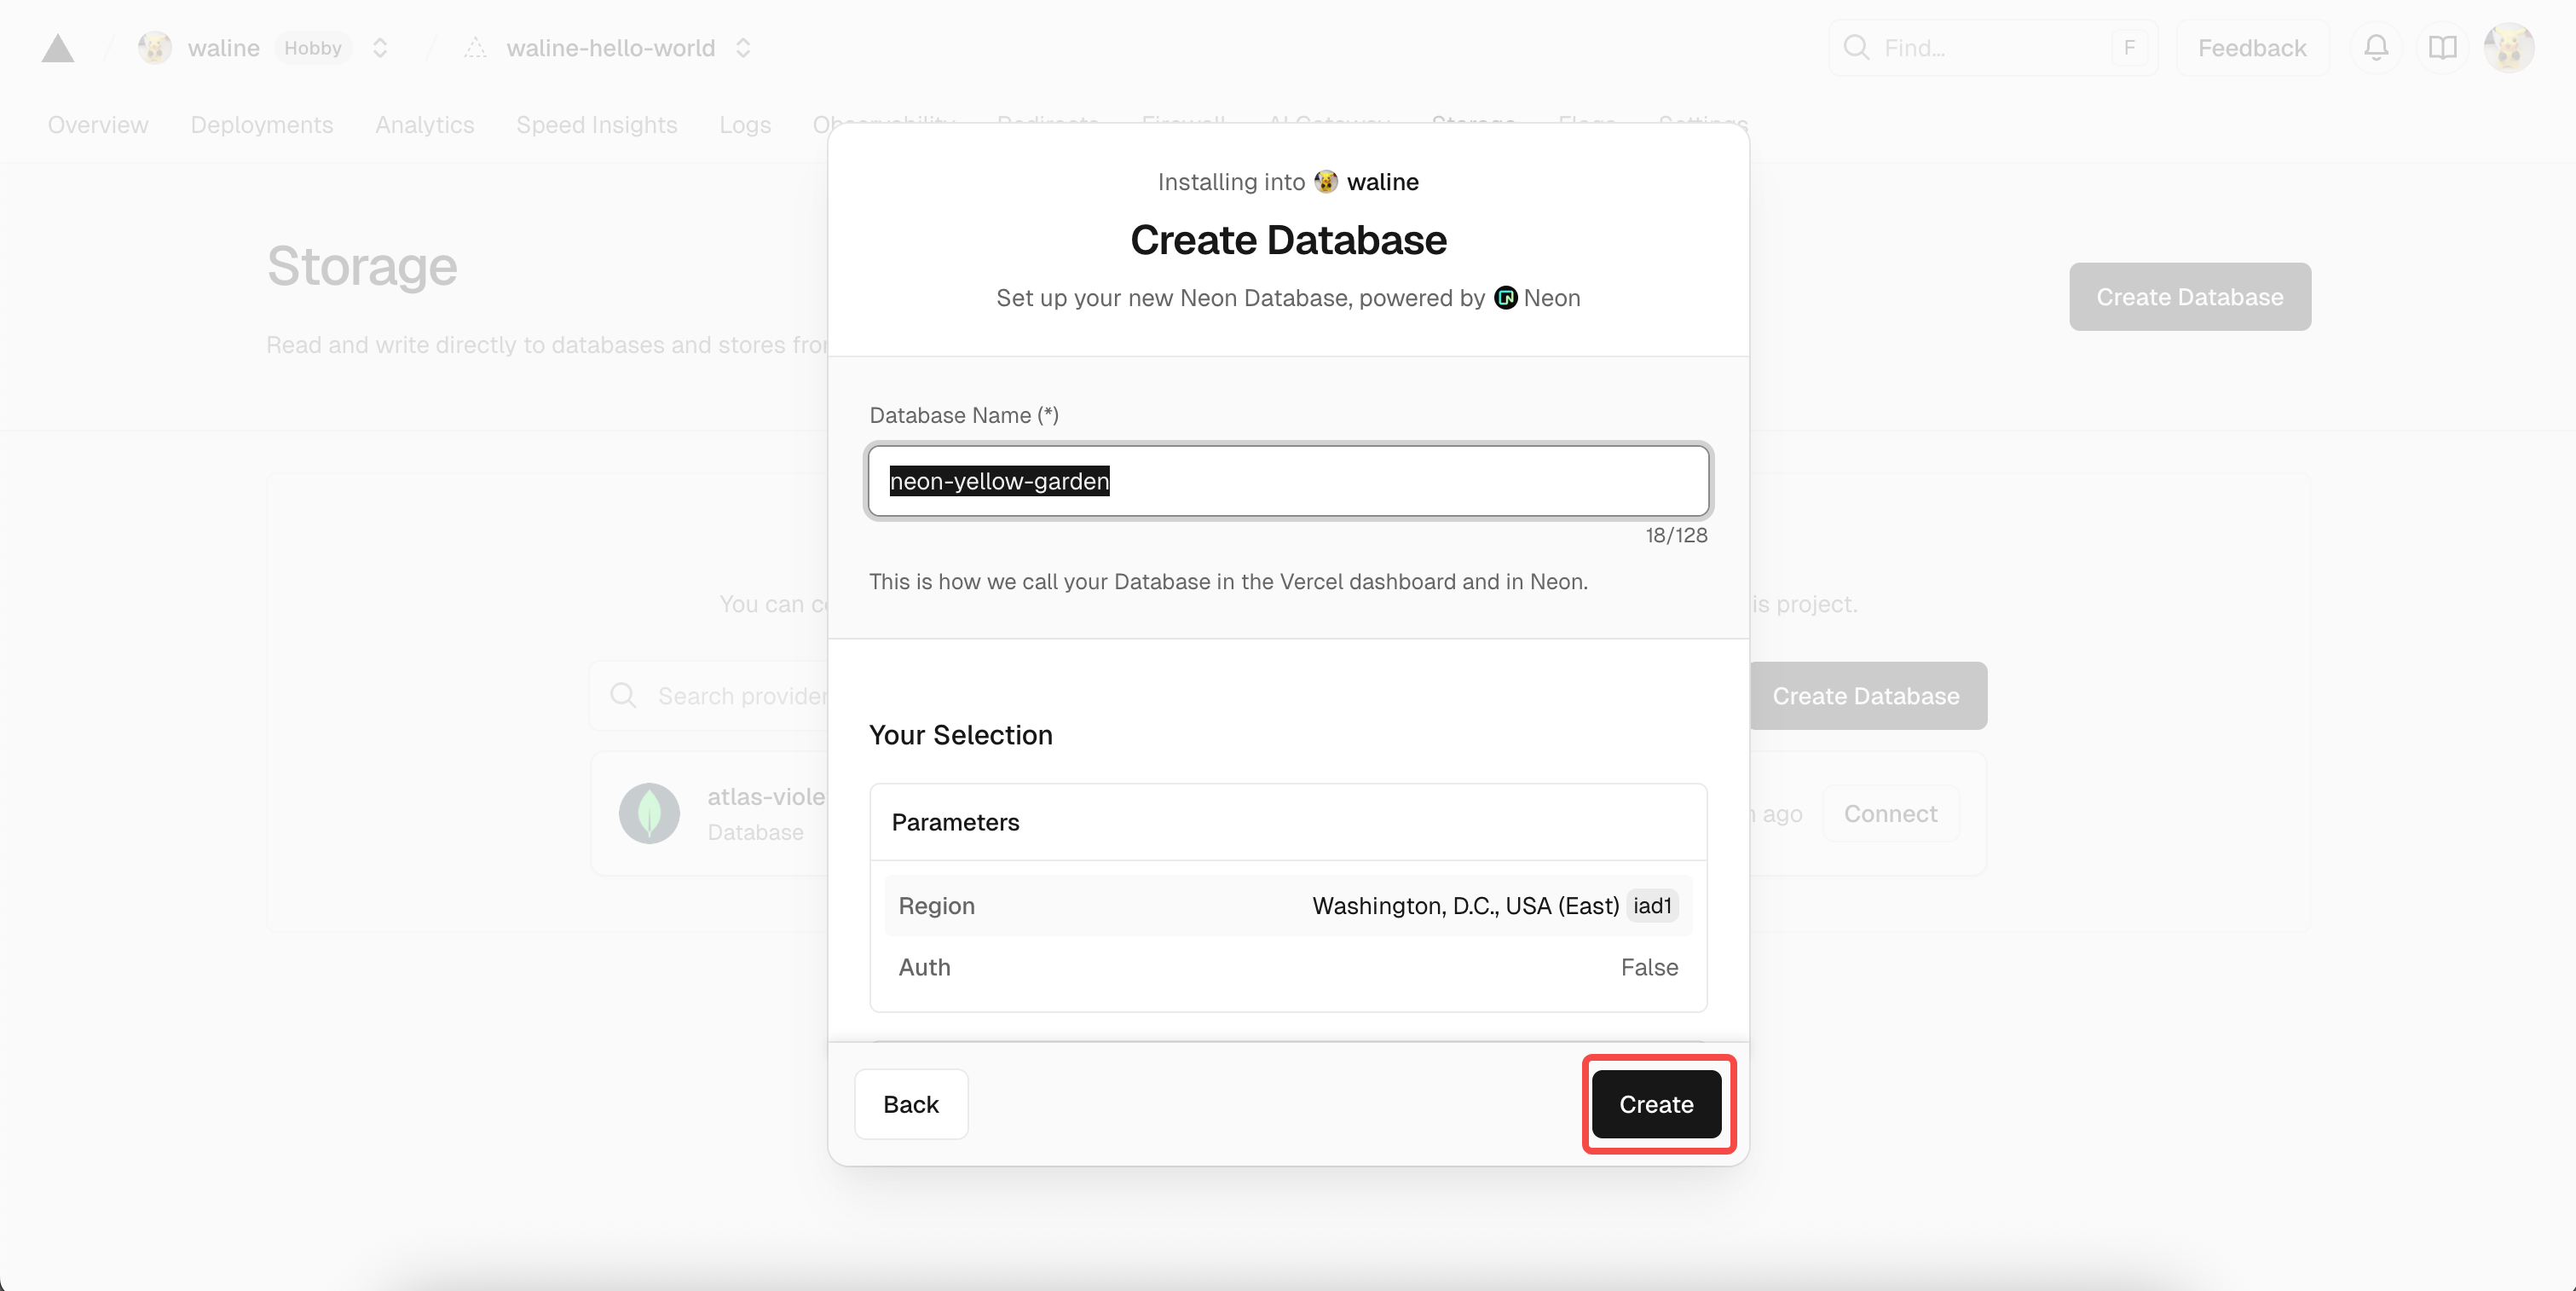
neon Now you should see the database service you just created under
Storage. Click it and selectOpen in Neonto jump to Neon. In the Neon interface, chooseSQL Editorfrom the left sidebar, paste the SQL statements from waline.pgsql into the editor, and clickRunto create the tables.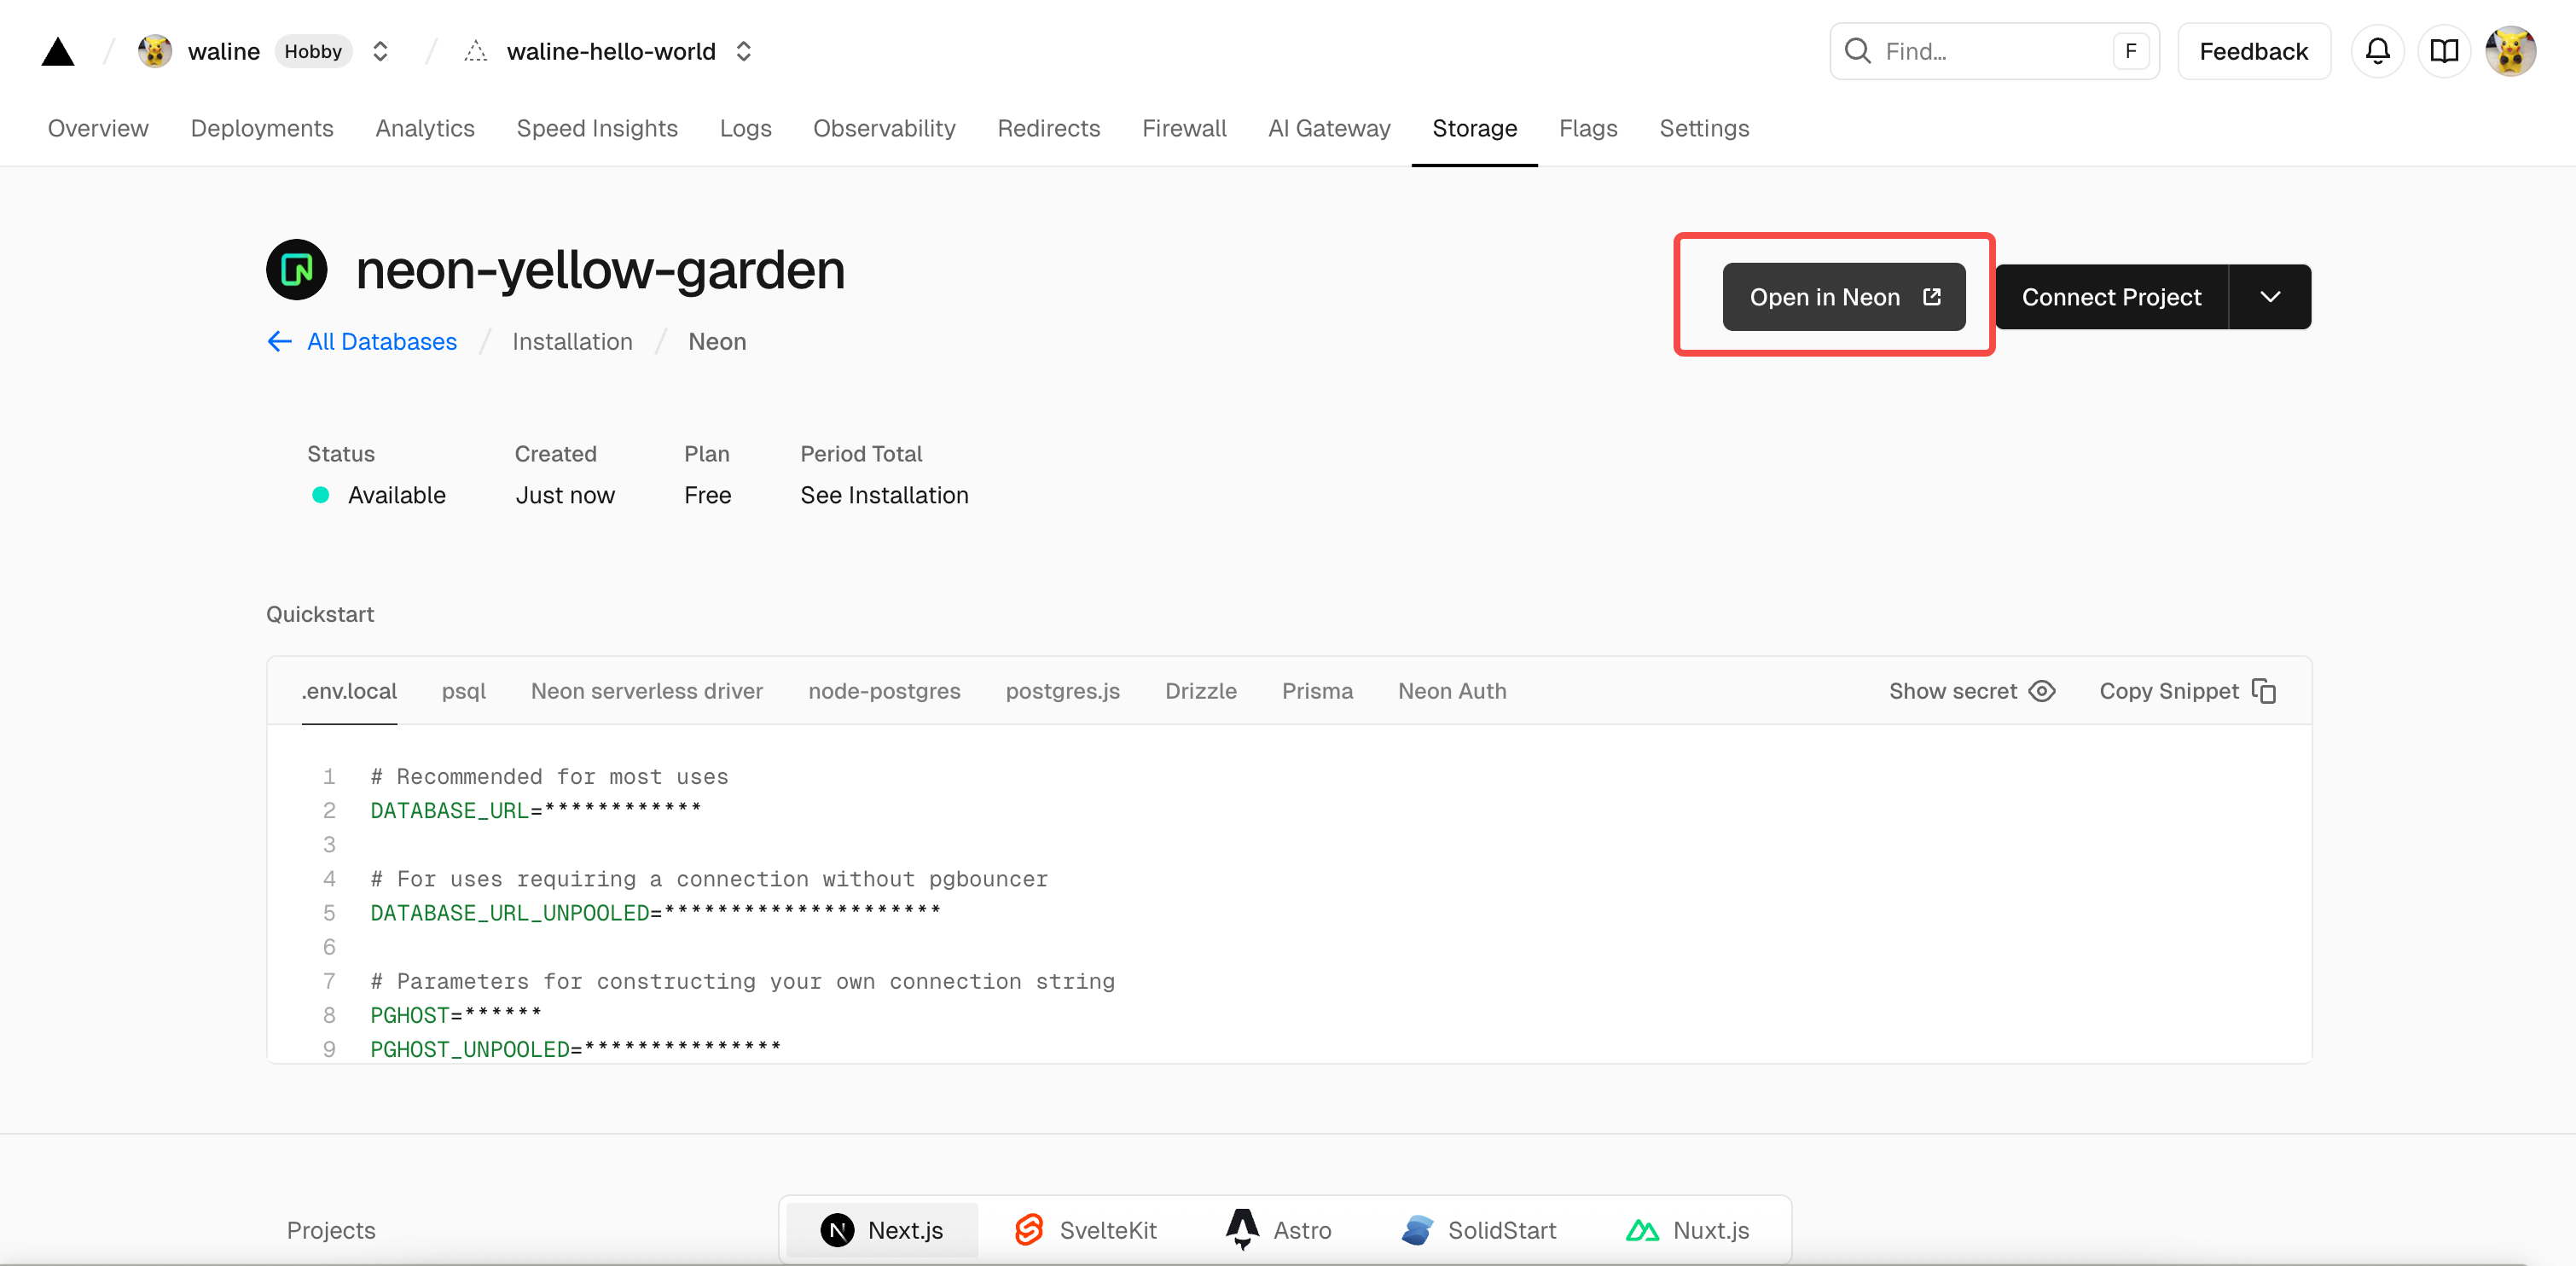
neon 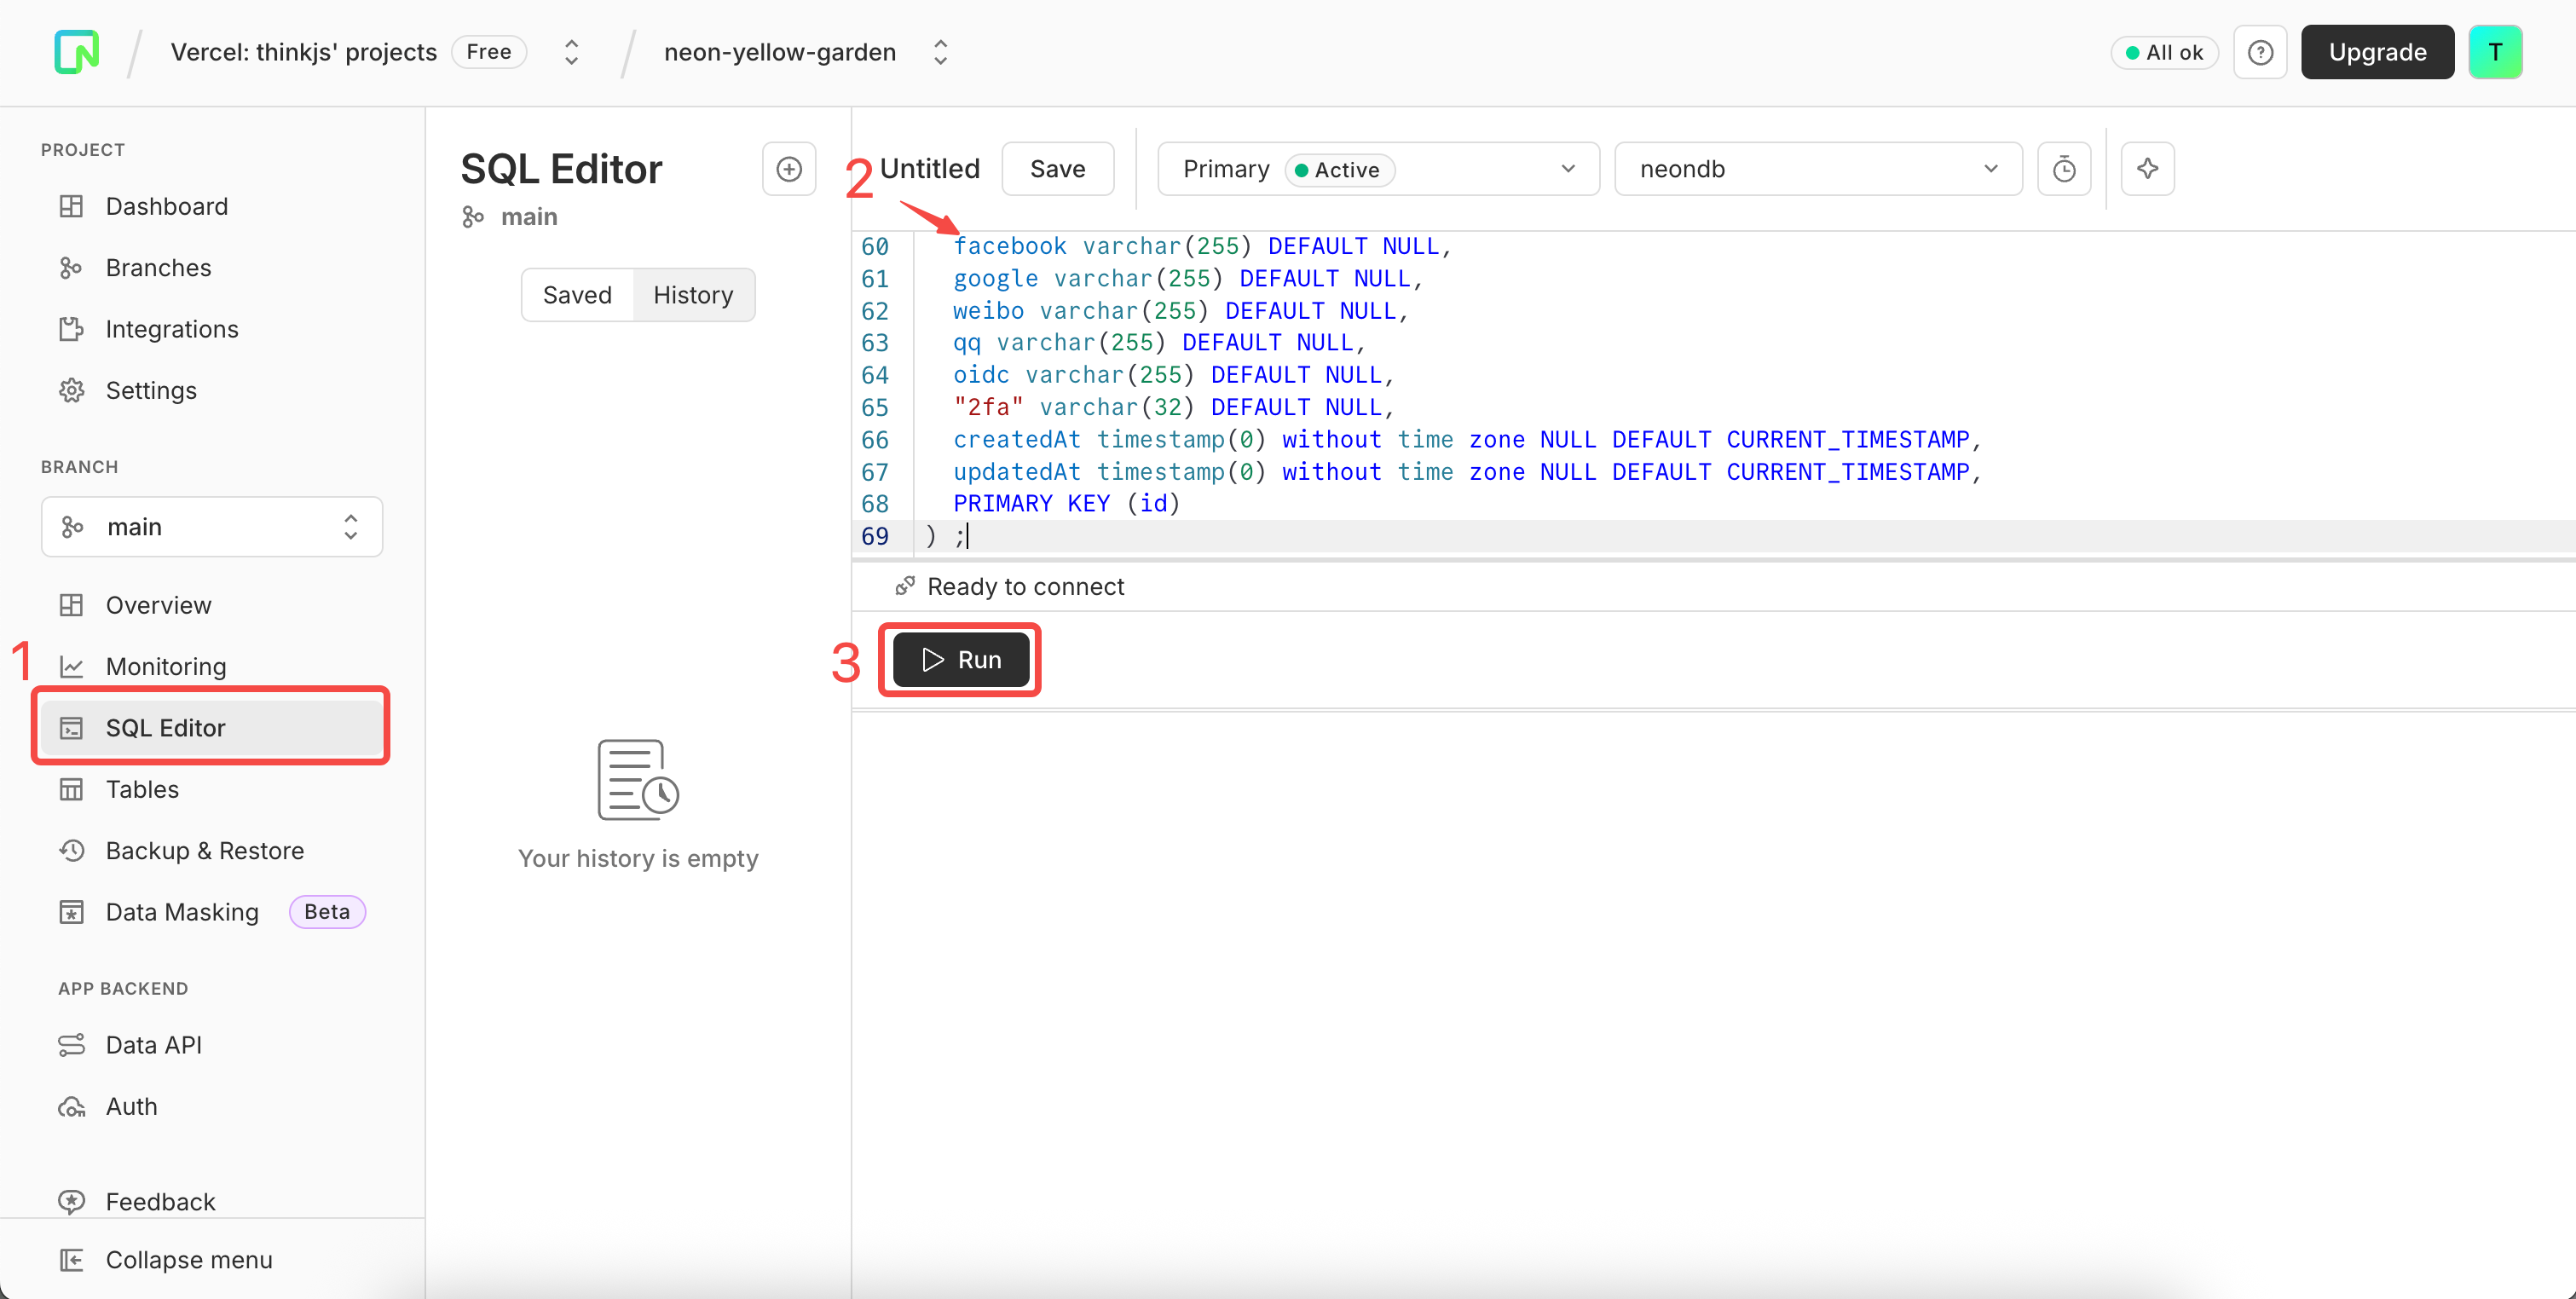
neon After a short while, you will be notified that the creation was successful. Go back to Vercel, click
Deploymentsat the top, and click theRedeploybutton on the right of the latest deployment. This step ensures that the newly configured database service takes effect.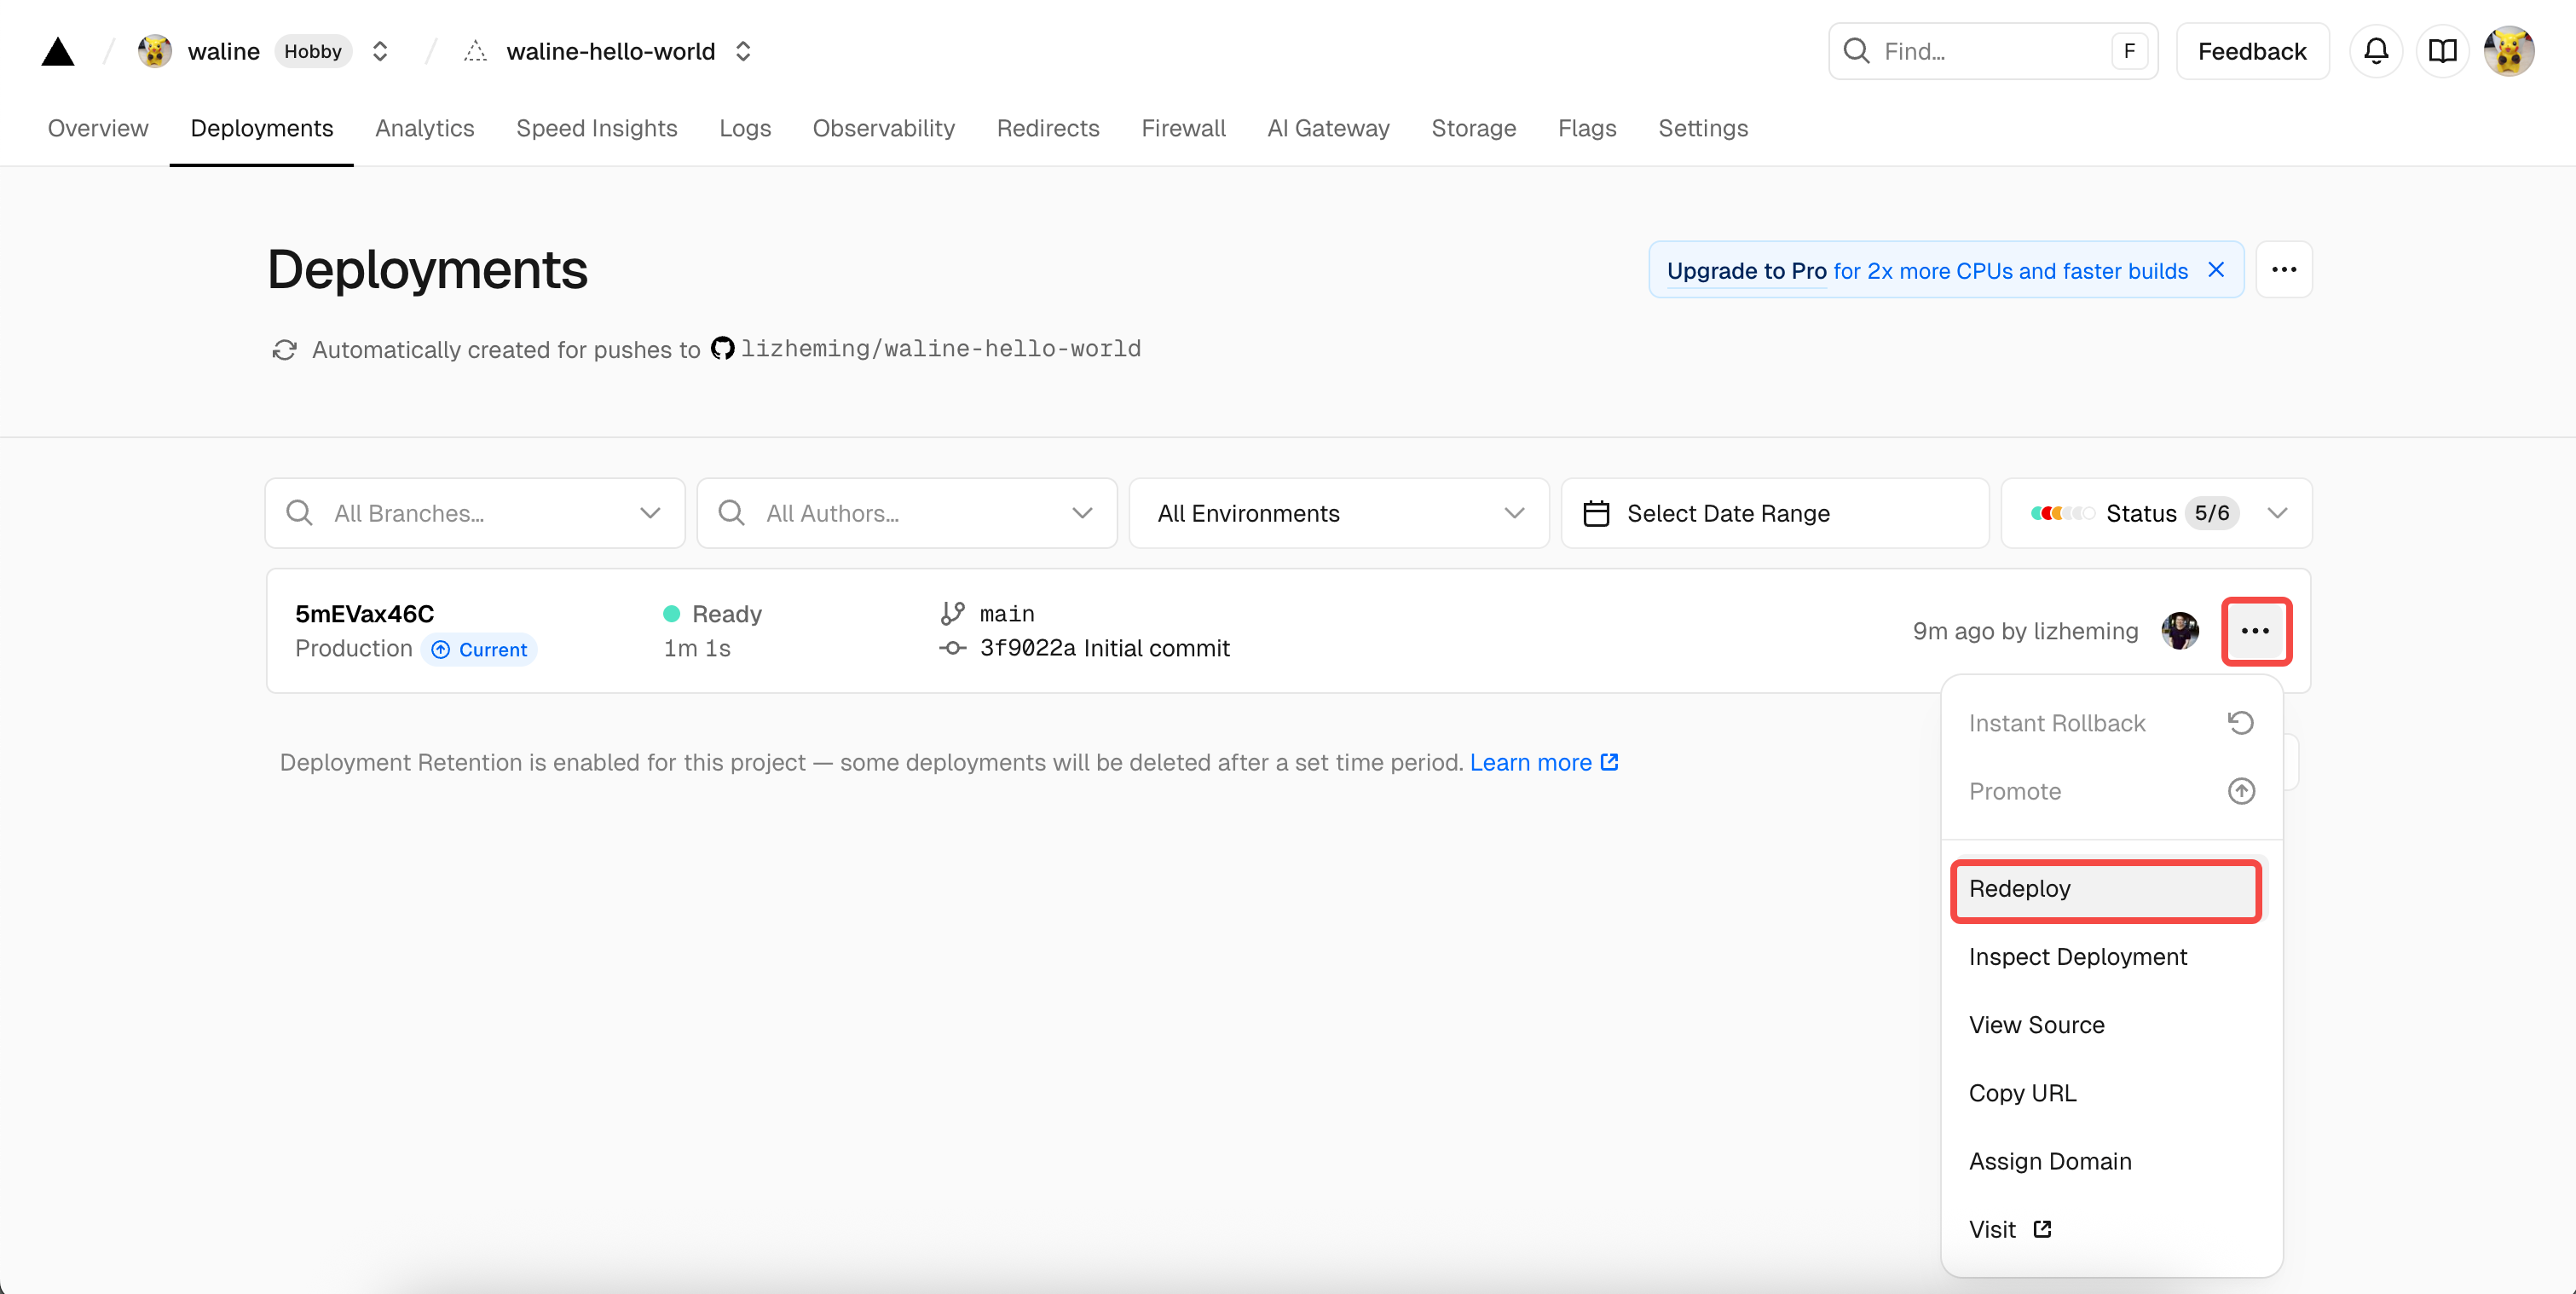
redeploy success You will be redirected to the
Overviewpage and the deployment will start. After a moment, theSTATUSwill change toReady. ClickVisitto open the deployed website. This URL is your server address.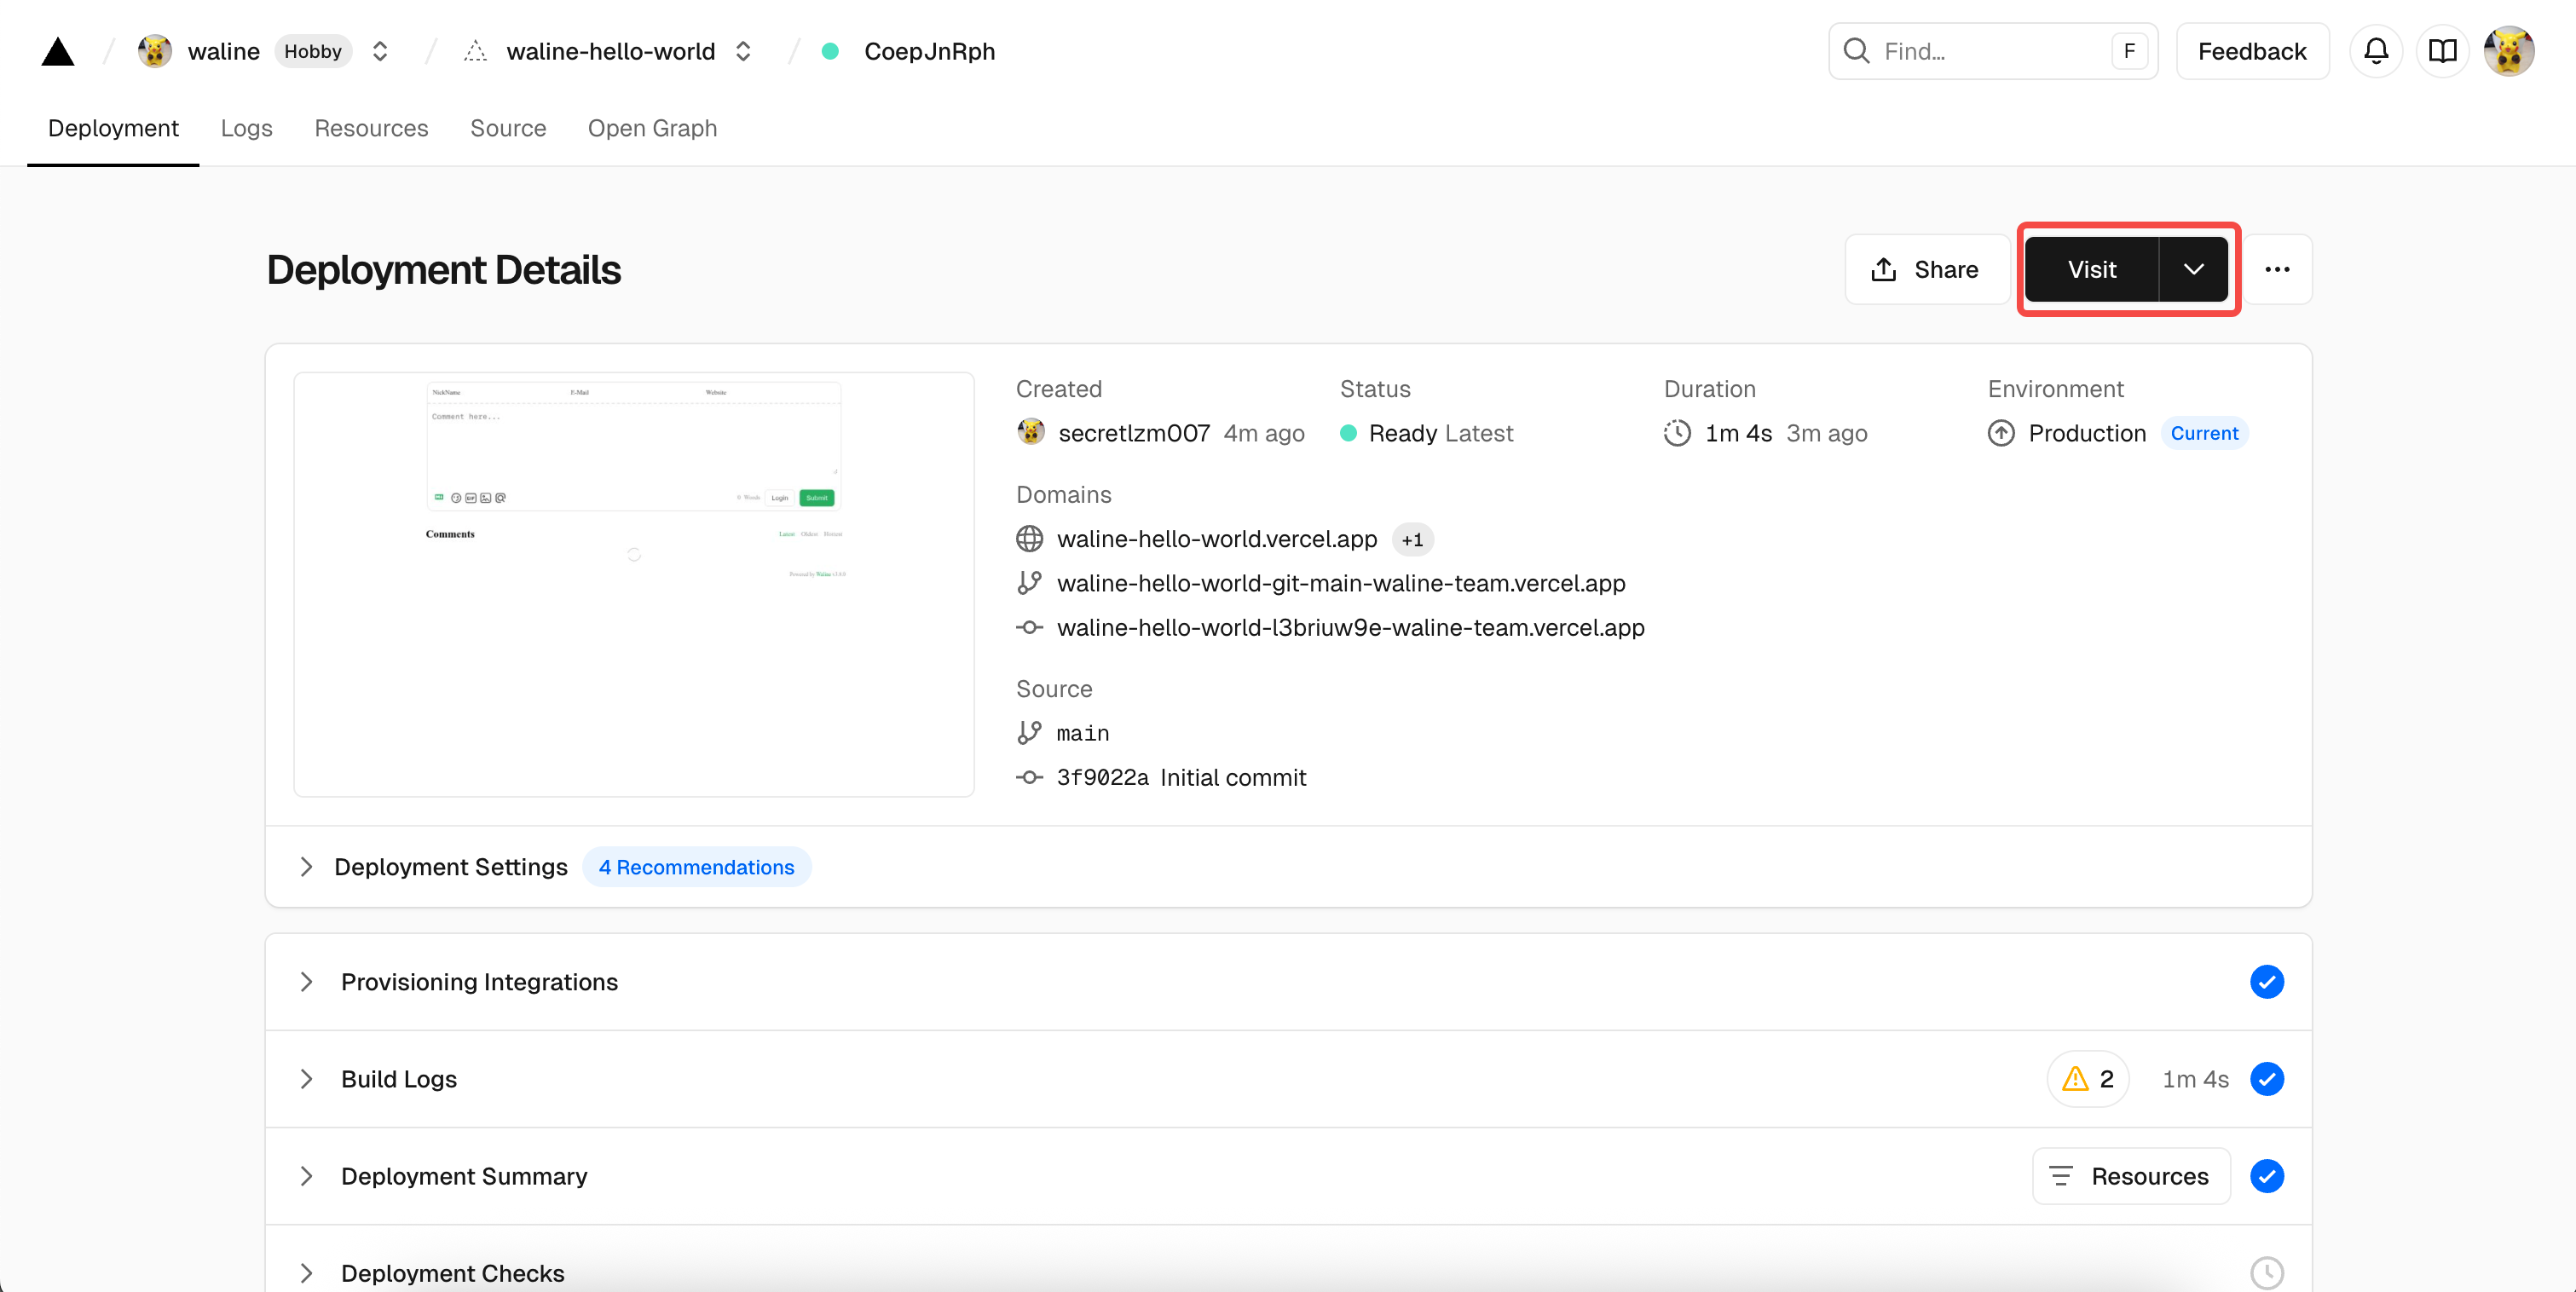
visit
Bind a Custom Domain
Click
Settings→Domainsat the top to enter the domain configuration page.Enter the domain you want to bind and click
Add.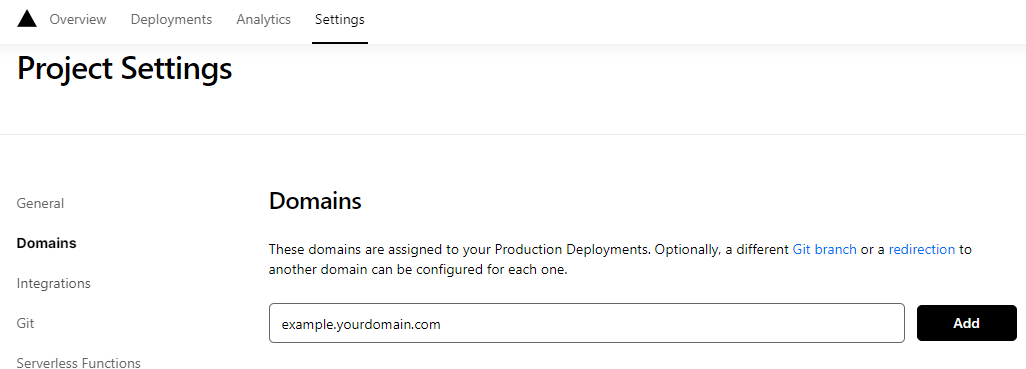
Add domain Add a new
CNAMErecord at your domain provider:Type Name Value CNAME example cname.vercel-dns.com Wait for the DNS record to take effect. You can then access Waline using your own domain 🎉
- Comment system: example.yourdomain.com
- Comment management: example.yourdomain.com/ui

success
Importing in HTML
Here is how you can add Waline to your web page or website:
Import the stylesheet
https://unpkg.com/@waline/client@v3/dist/waline.cssin the<head>Create a
<script>tag and initialize withinit()fromhttps://unpkg.com/@waline/client@v3/dist/waline.jswhile passing in the necessaryelandserverURLoptions.- The
eloption is the element used for Waline rendering. You can set a CSS selector in the form of a string or an HTMLElement object. serverURLis the link to your deployment server, which you just created in Vercel.- For more options, visit the Component Props page
Here is an example:
<head> <!-- ... --> <link rel="stylesheet" href="https://unpkg.com/@waline/client@v3/dist/waline.css" /> </head> <body> <!-- ... --> <div id="waline"></div> <script type="module"> import { init } from 'https://unpkg.com/@waline/client@v3/dist/waline.js'; init({ el: '#waline', serverURL: 'https://your-domain.vercel.app', lang: 'en', }); </script> </body>- The
The comment service will now run successfully on your website 🎉!
Comment Management (Management)
After the deployment is complete, please visit
<serverURL>/ui/registerto register. The first person to register will be set as an administrator.After you log in as administrator, you'll be able to access the comment management dashboard. You can edit, mark or delete comments here.
Users can also register for an account via the comment box, and will be redirected to their profile page after logging in.
Video Tutorial
An enthusiastic Waline user made the following video tutorial. If the instructions above aren't clear, you can refer to the video: